
Kazanahome
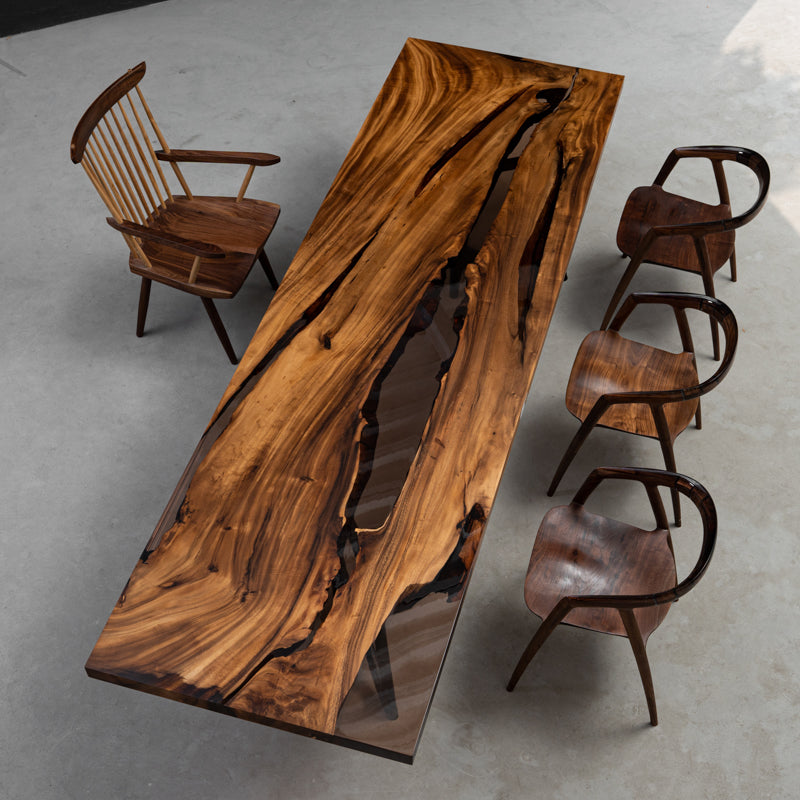
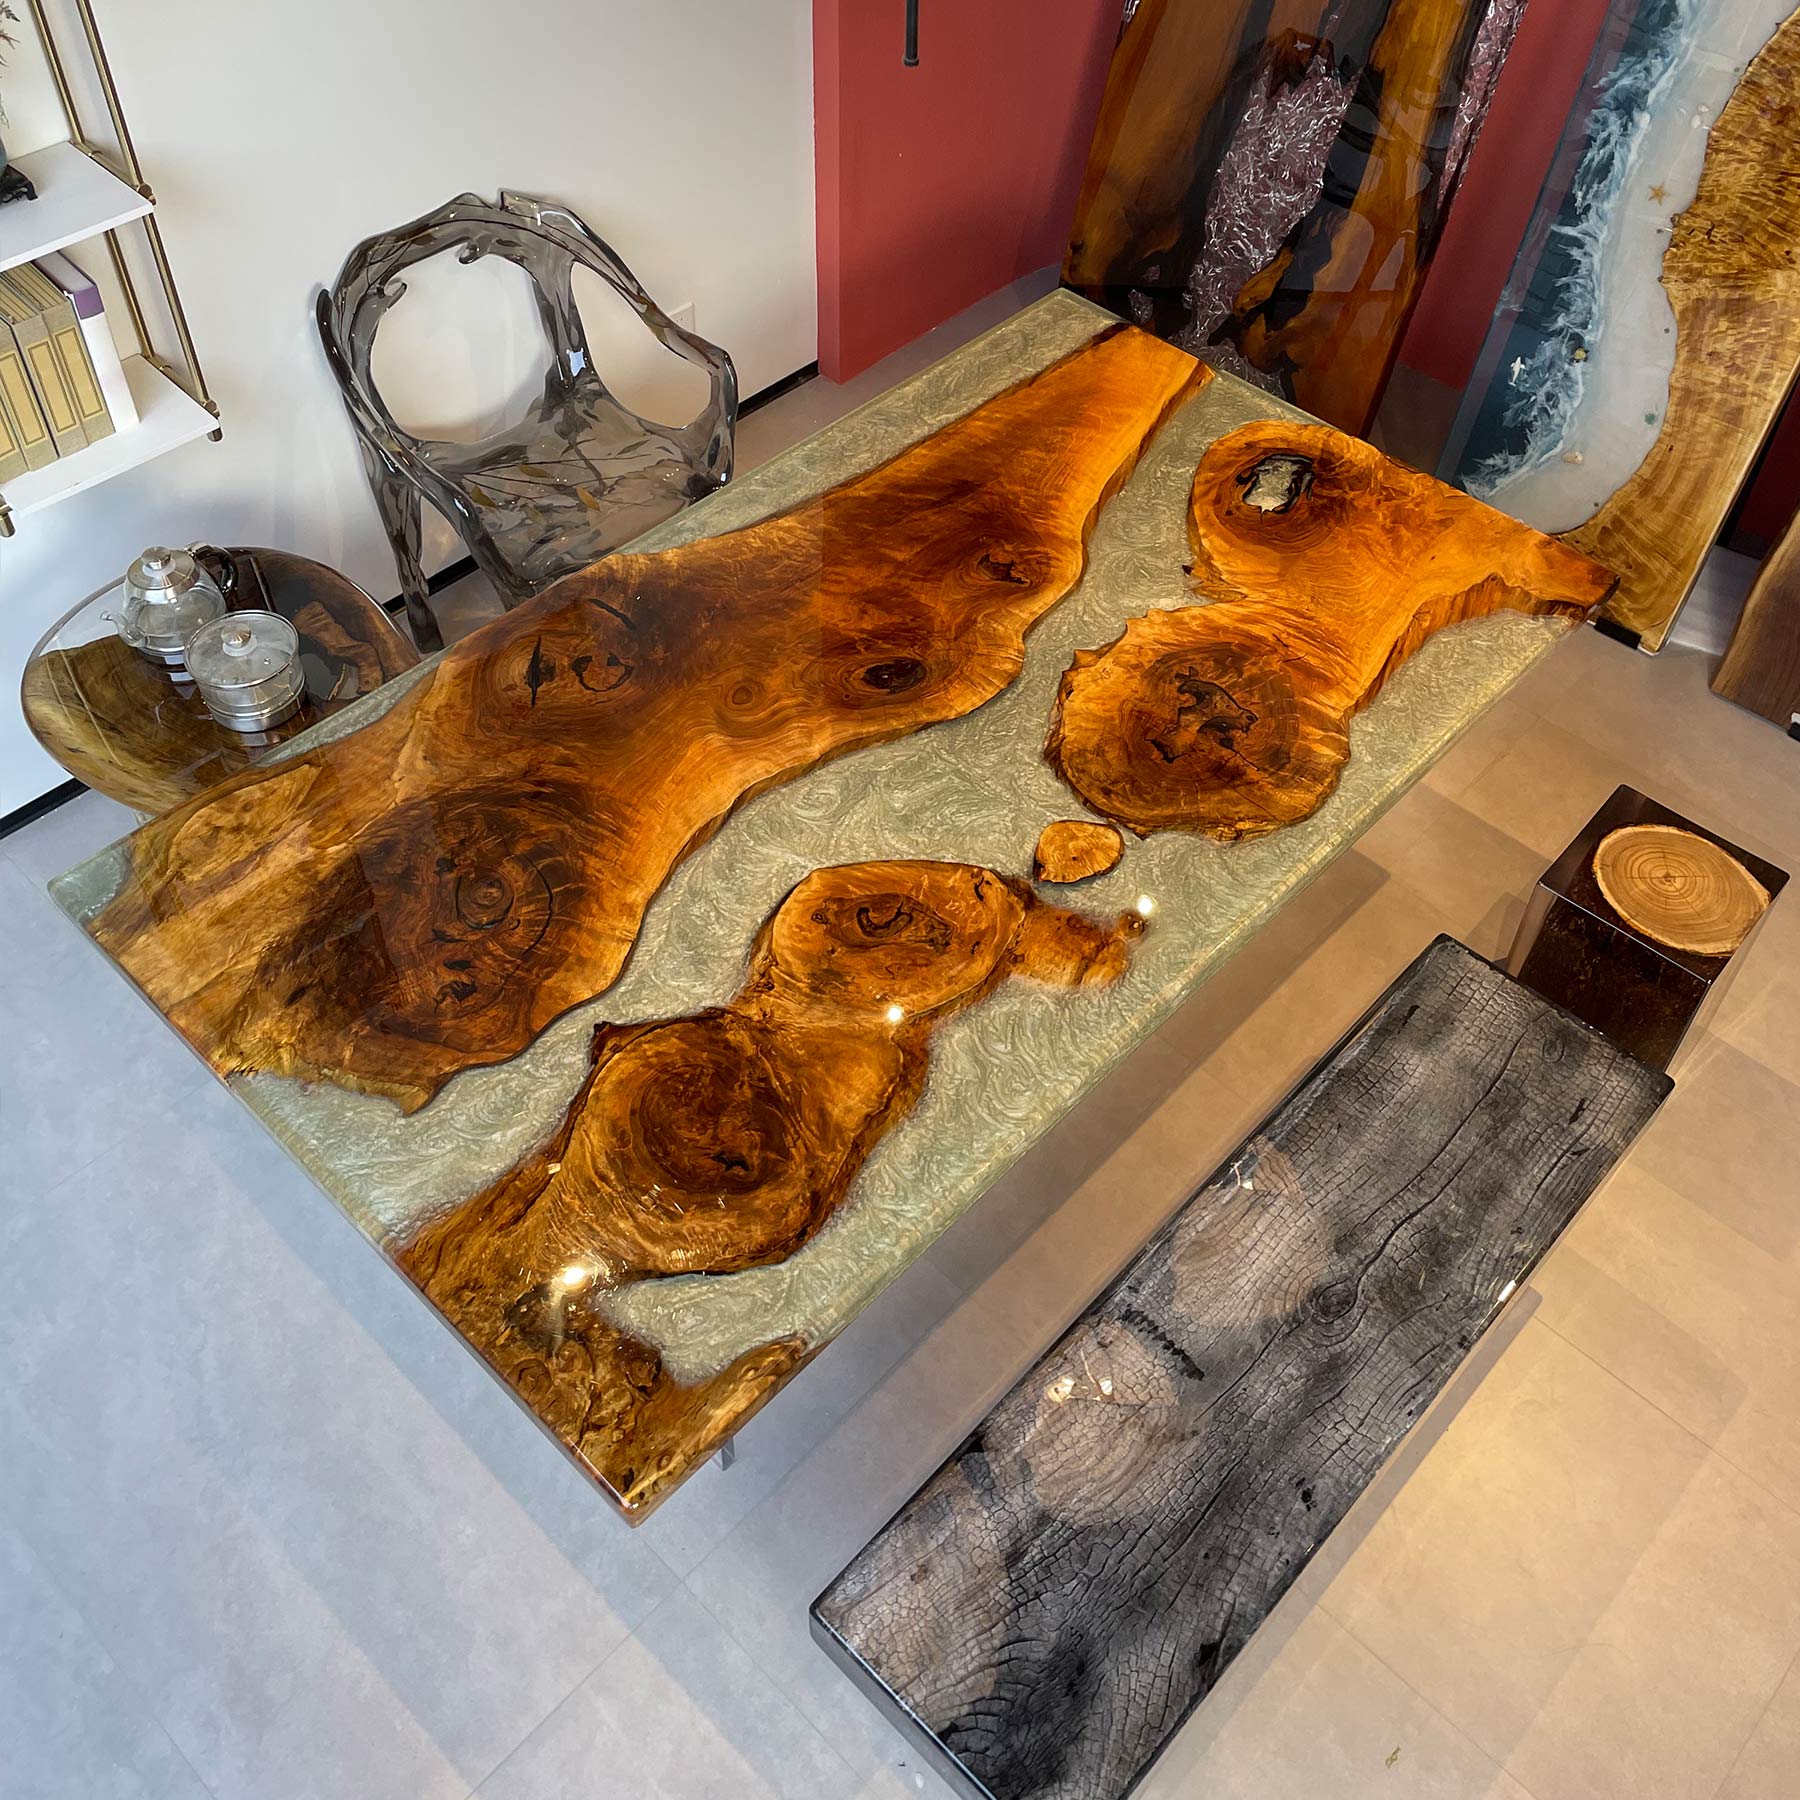
KAZANAHOME Rectangular Black Walnut Wood Epoxy Resin Table 48.03"Wx83.97" L
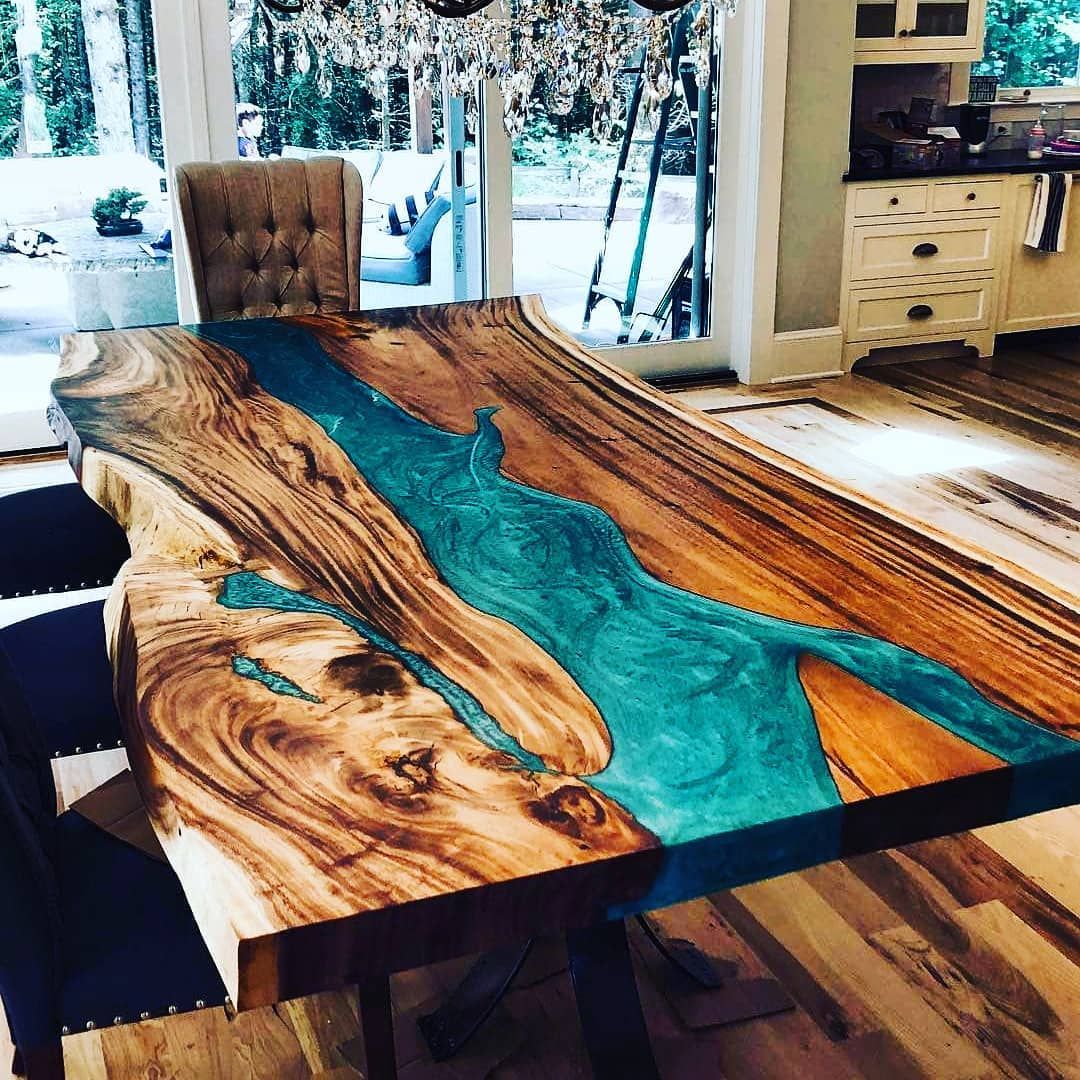
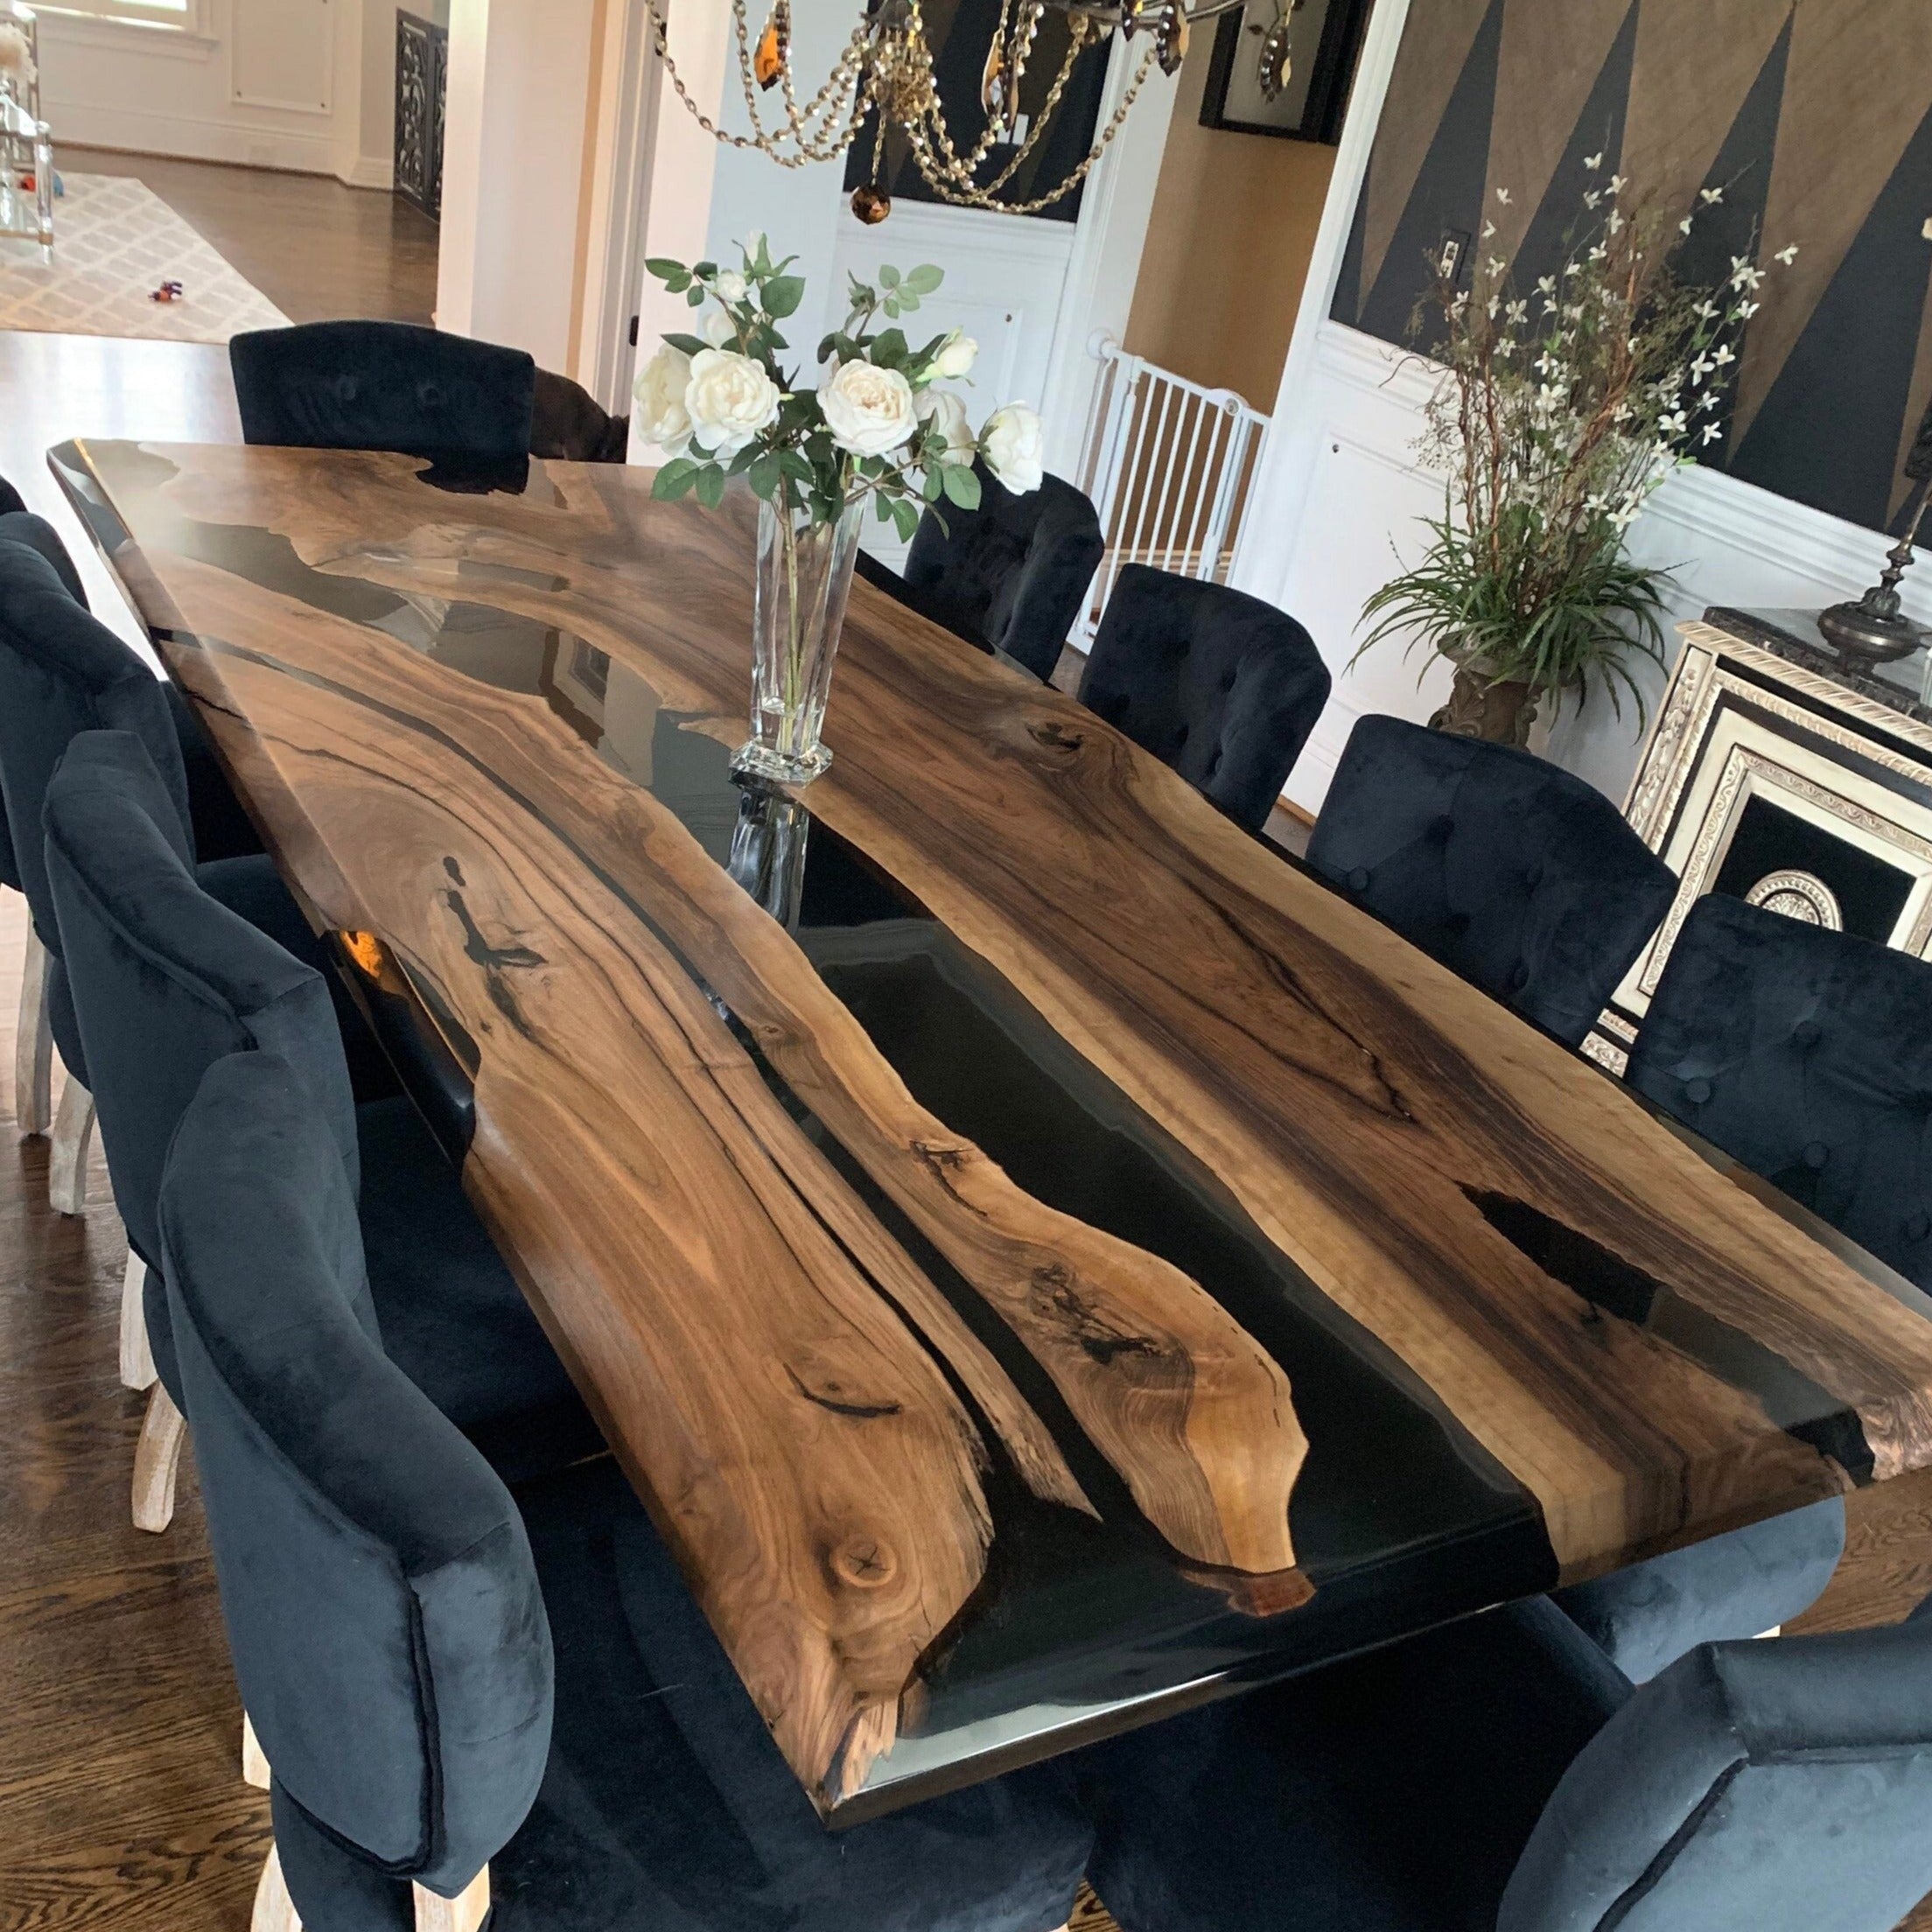
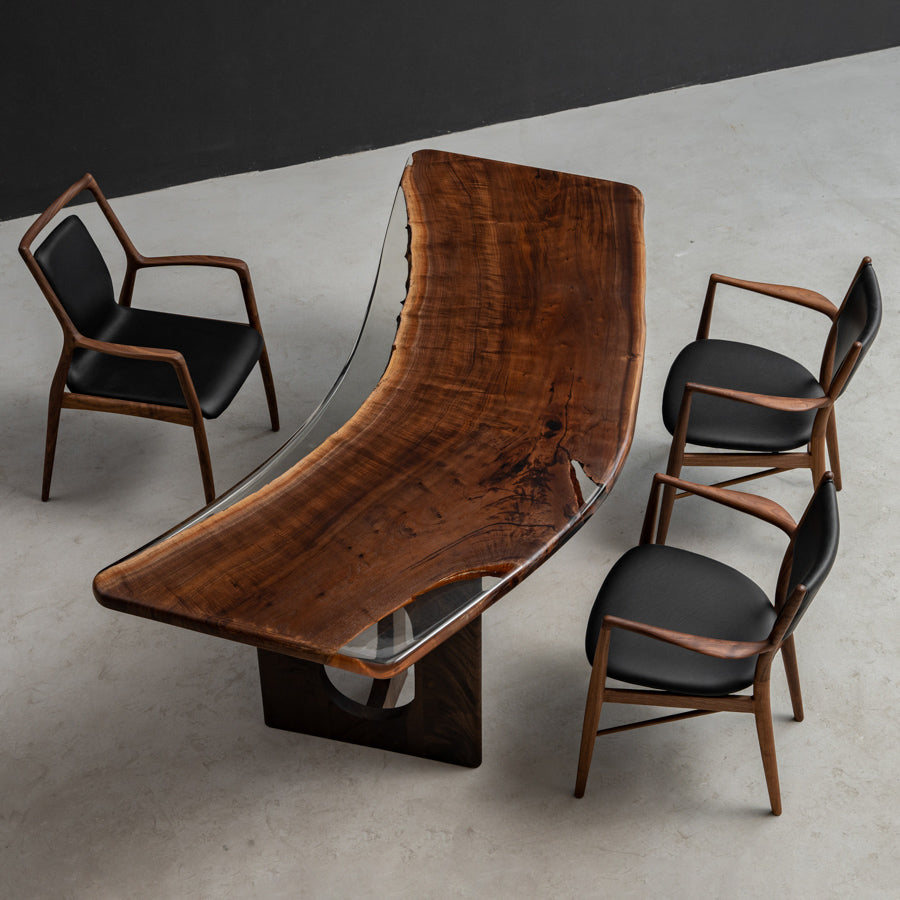
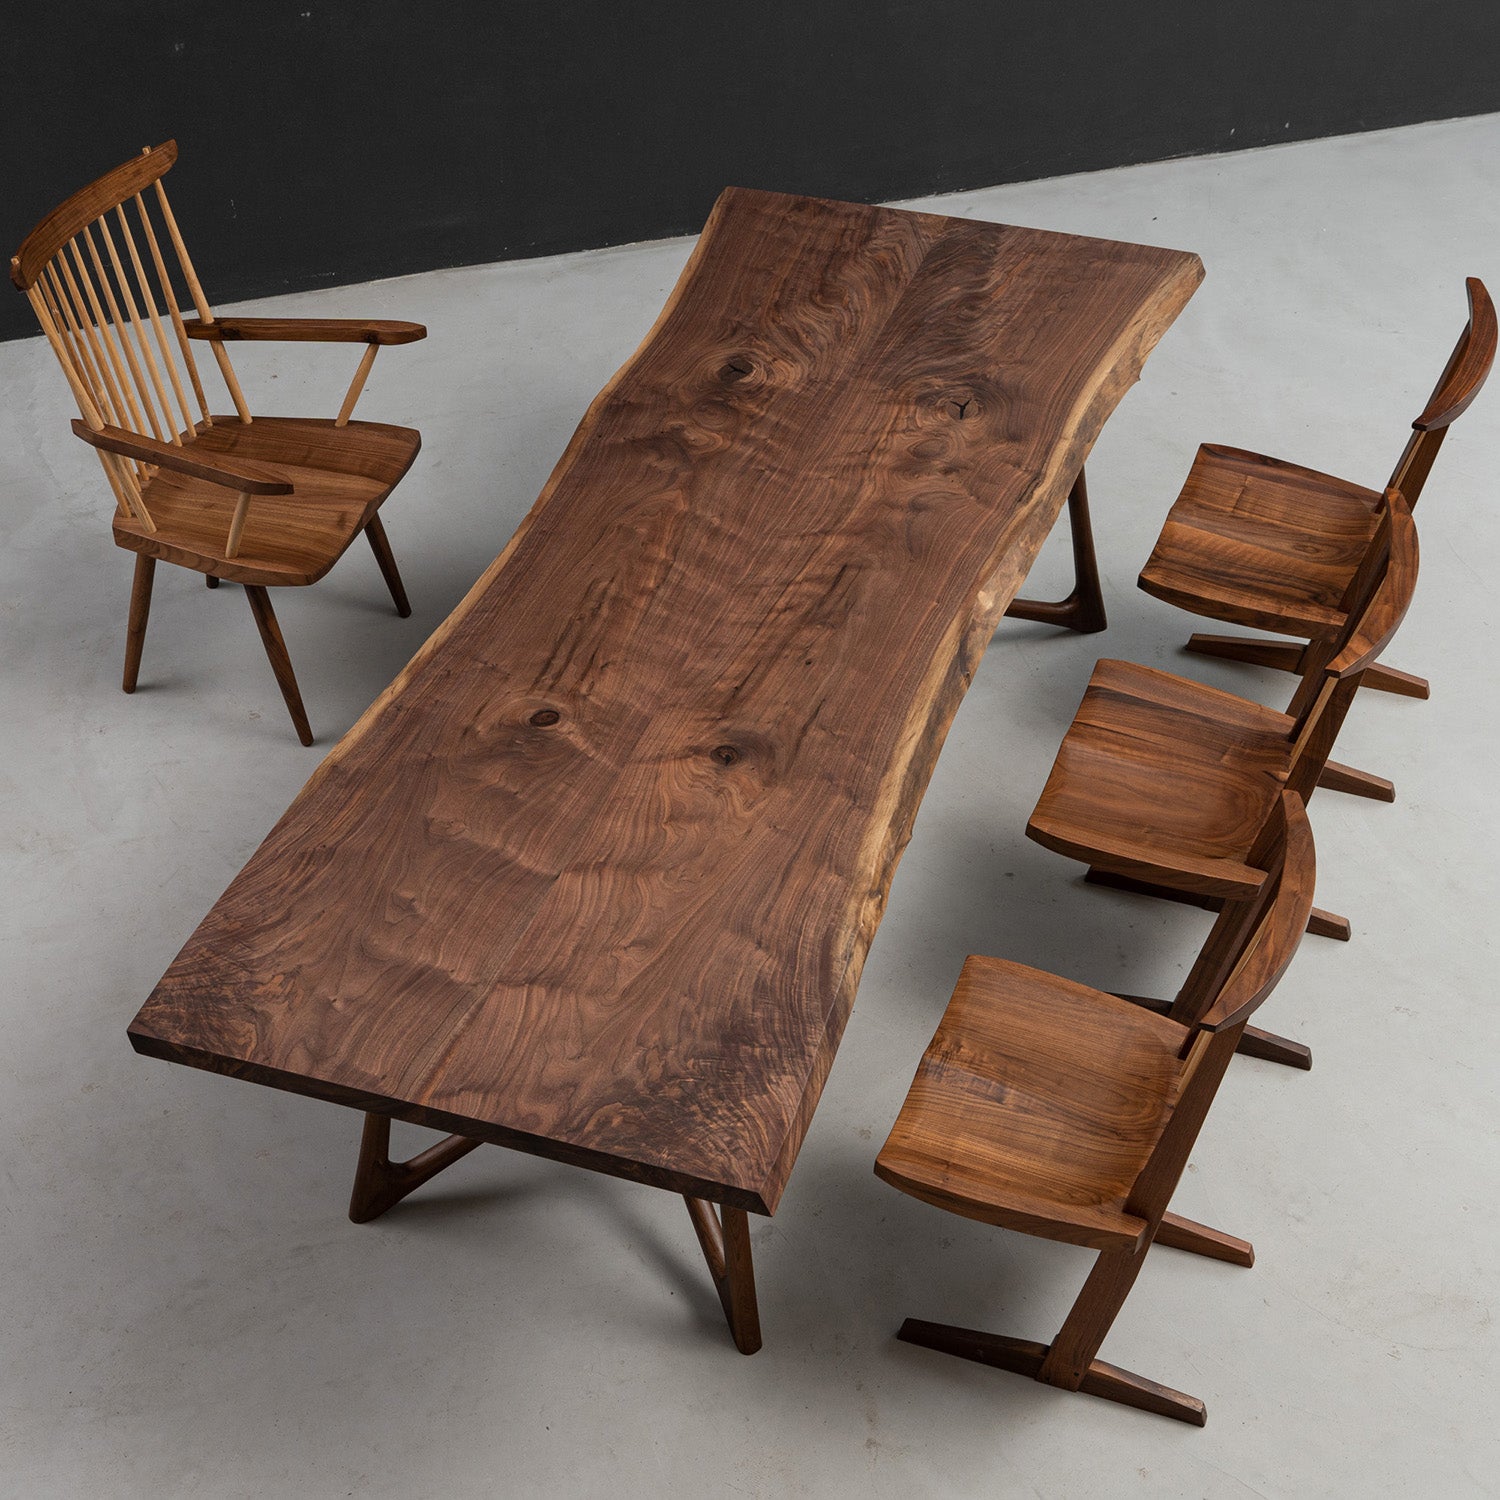
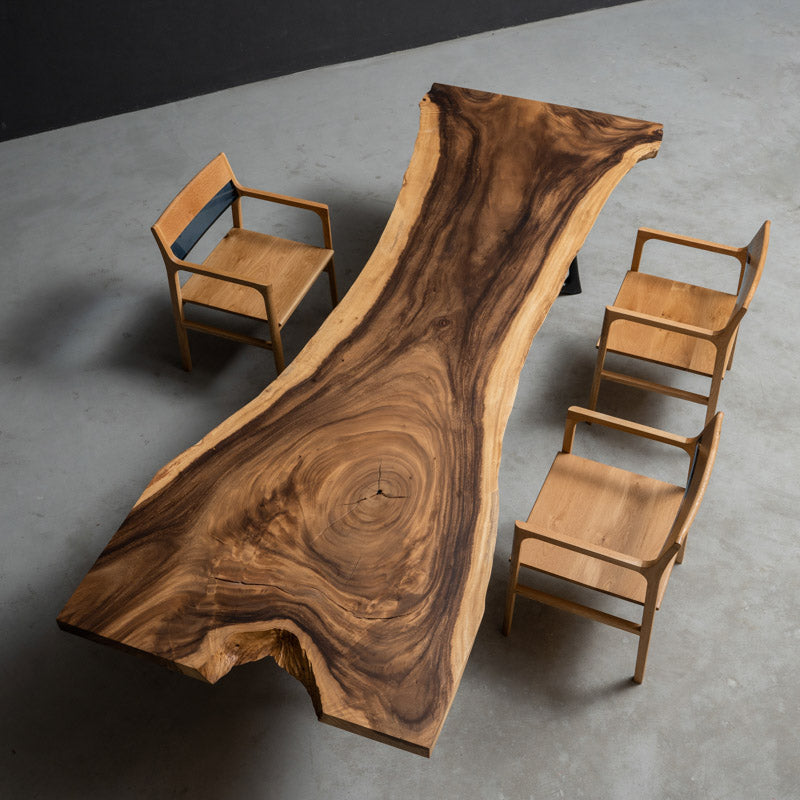
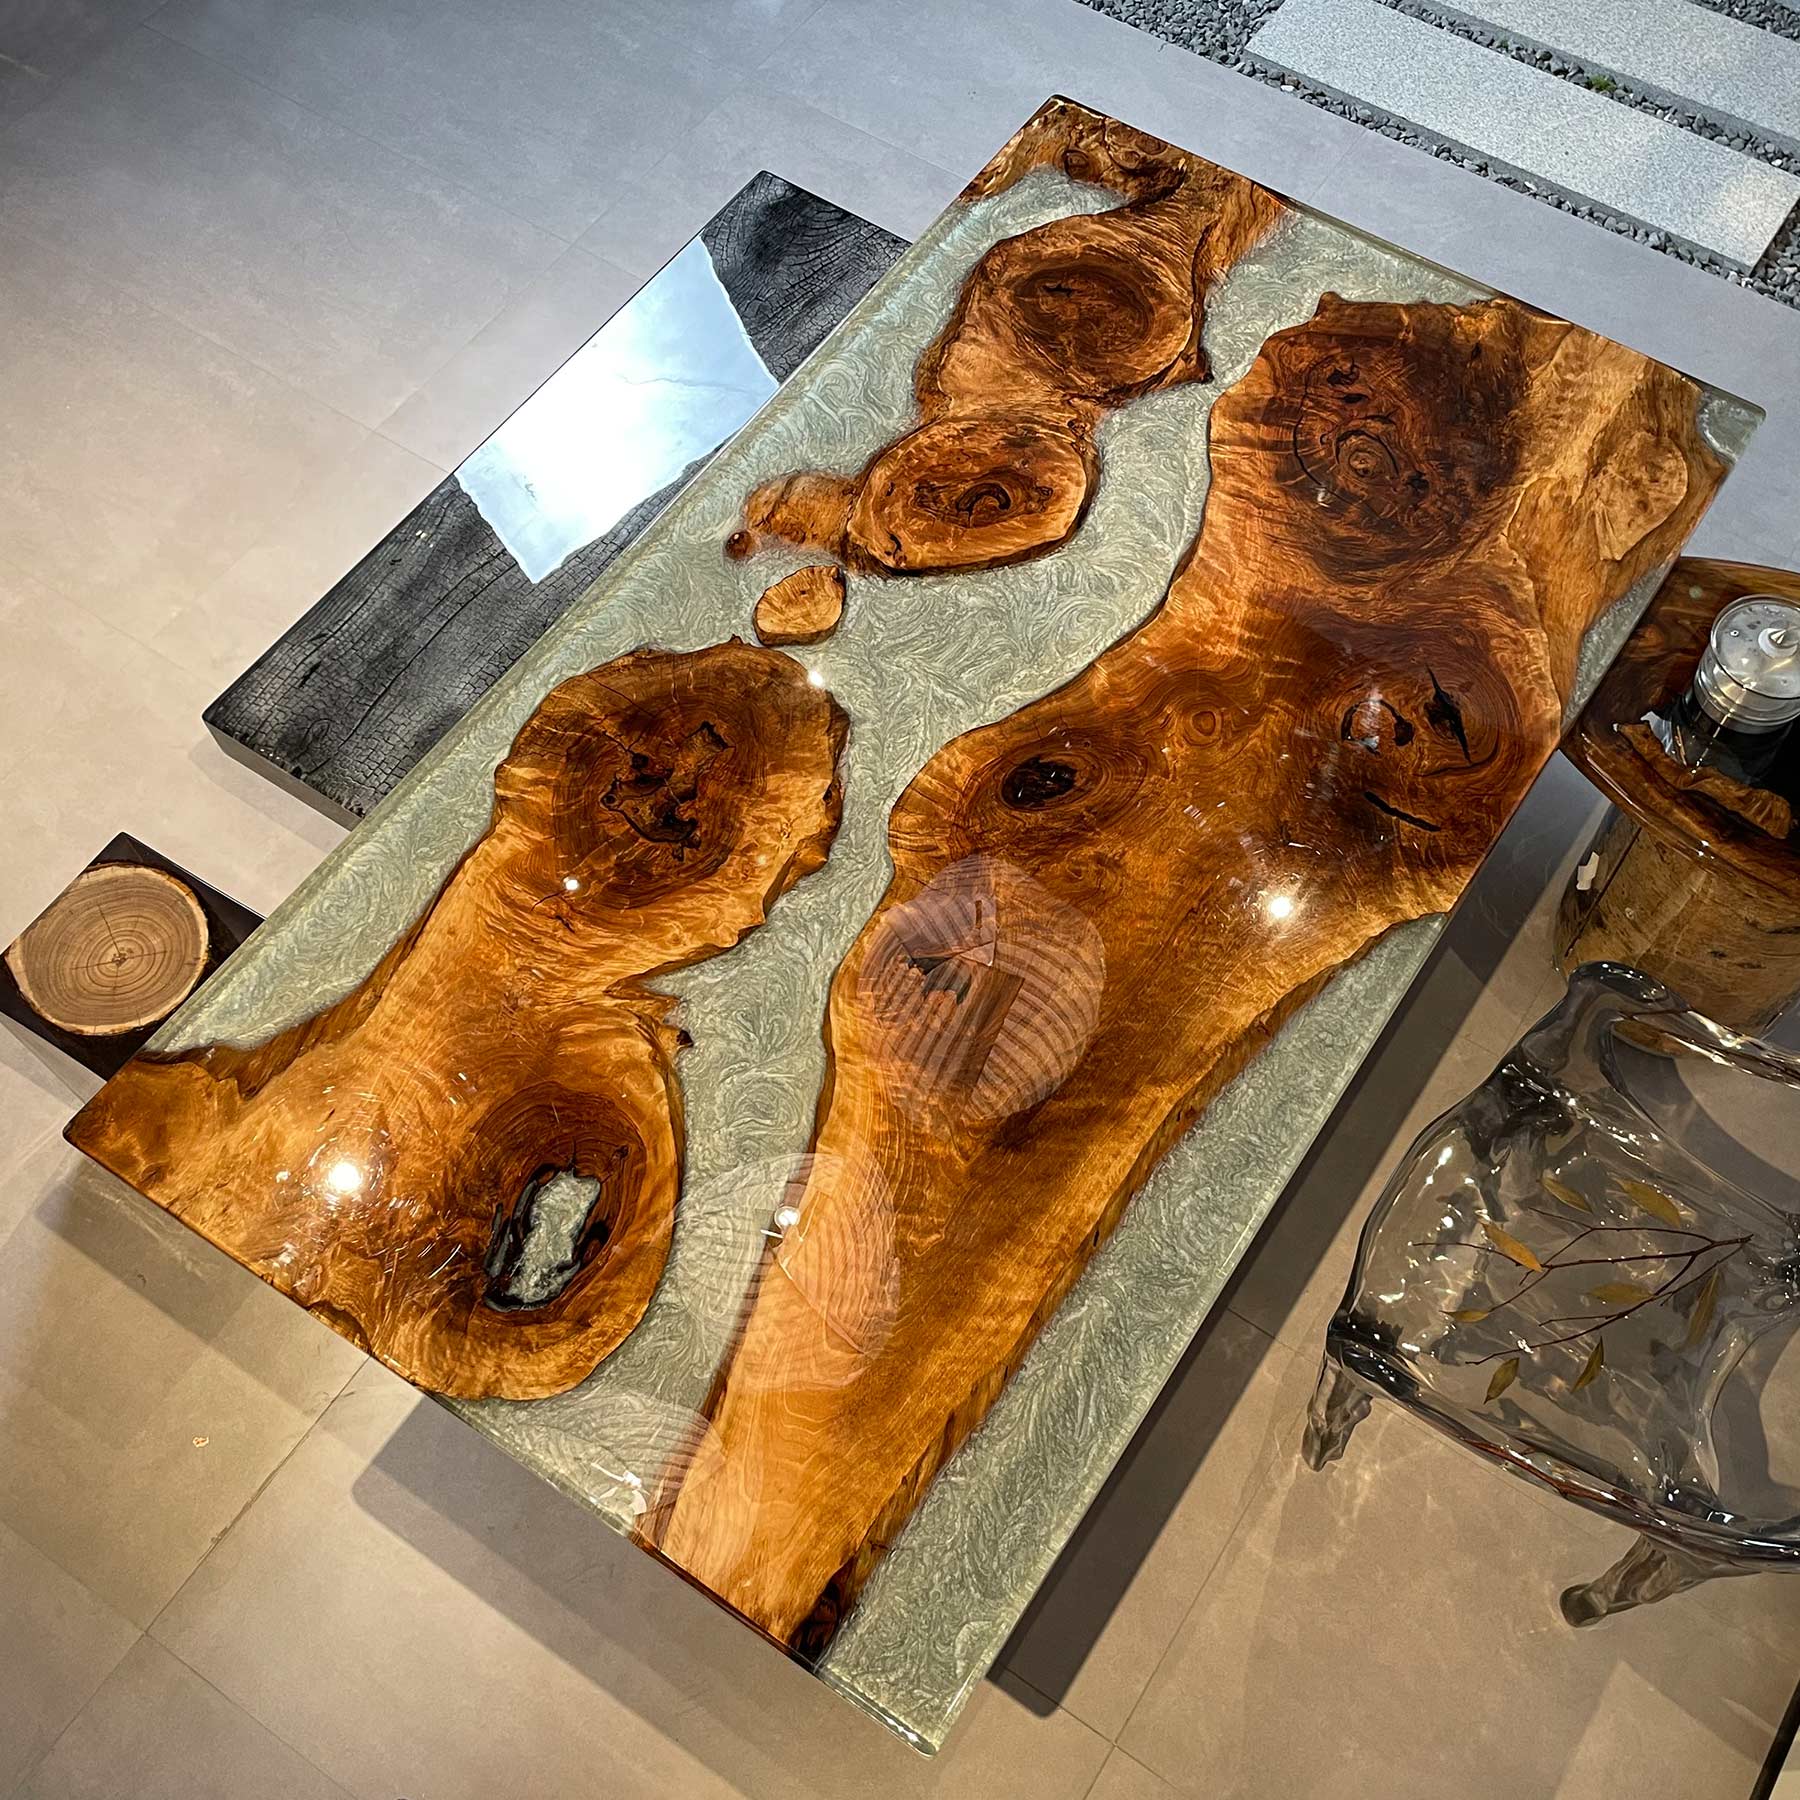
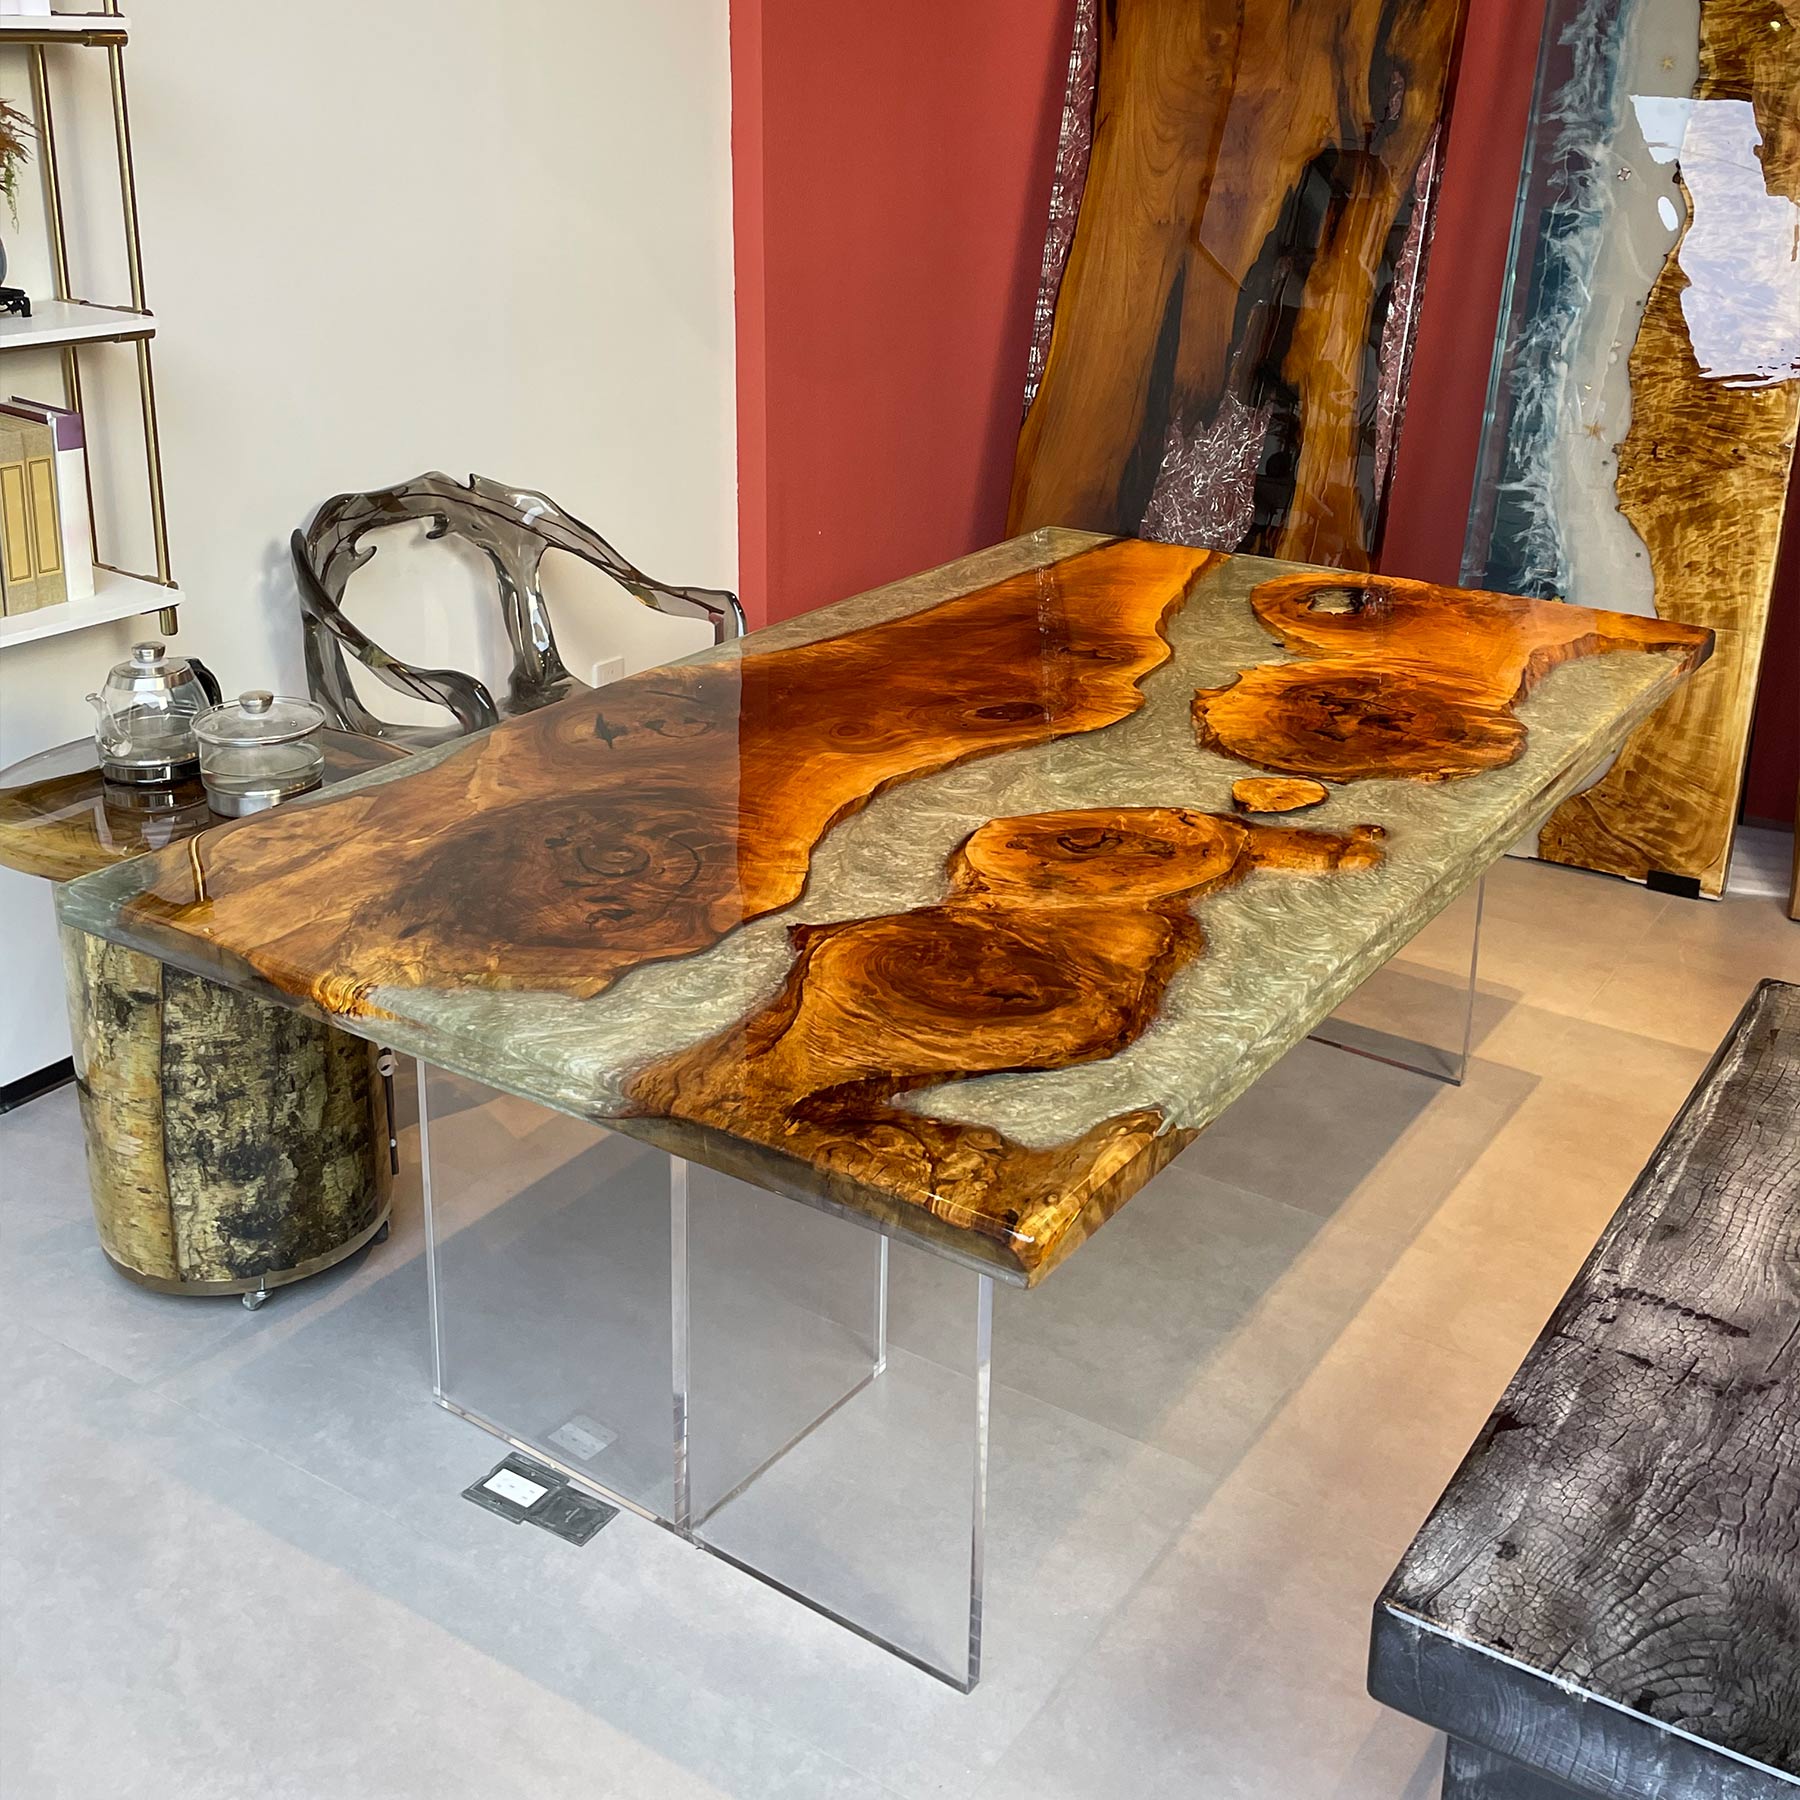
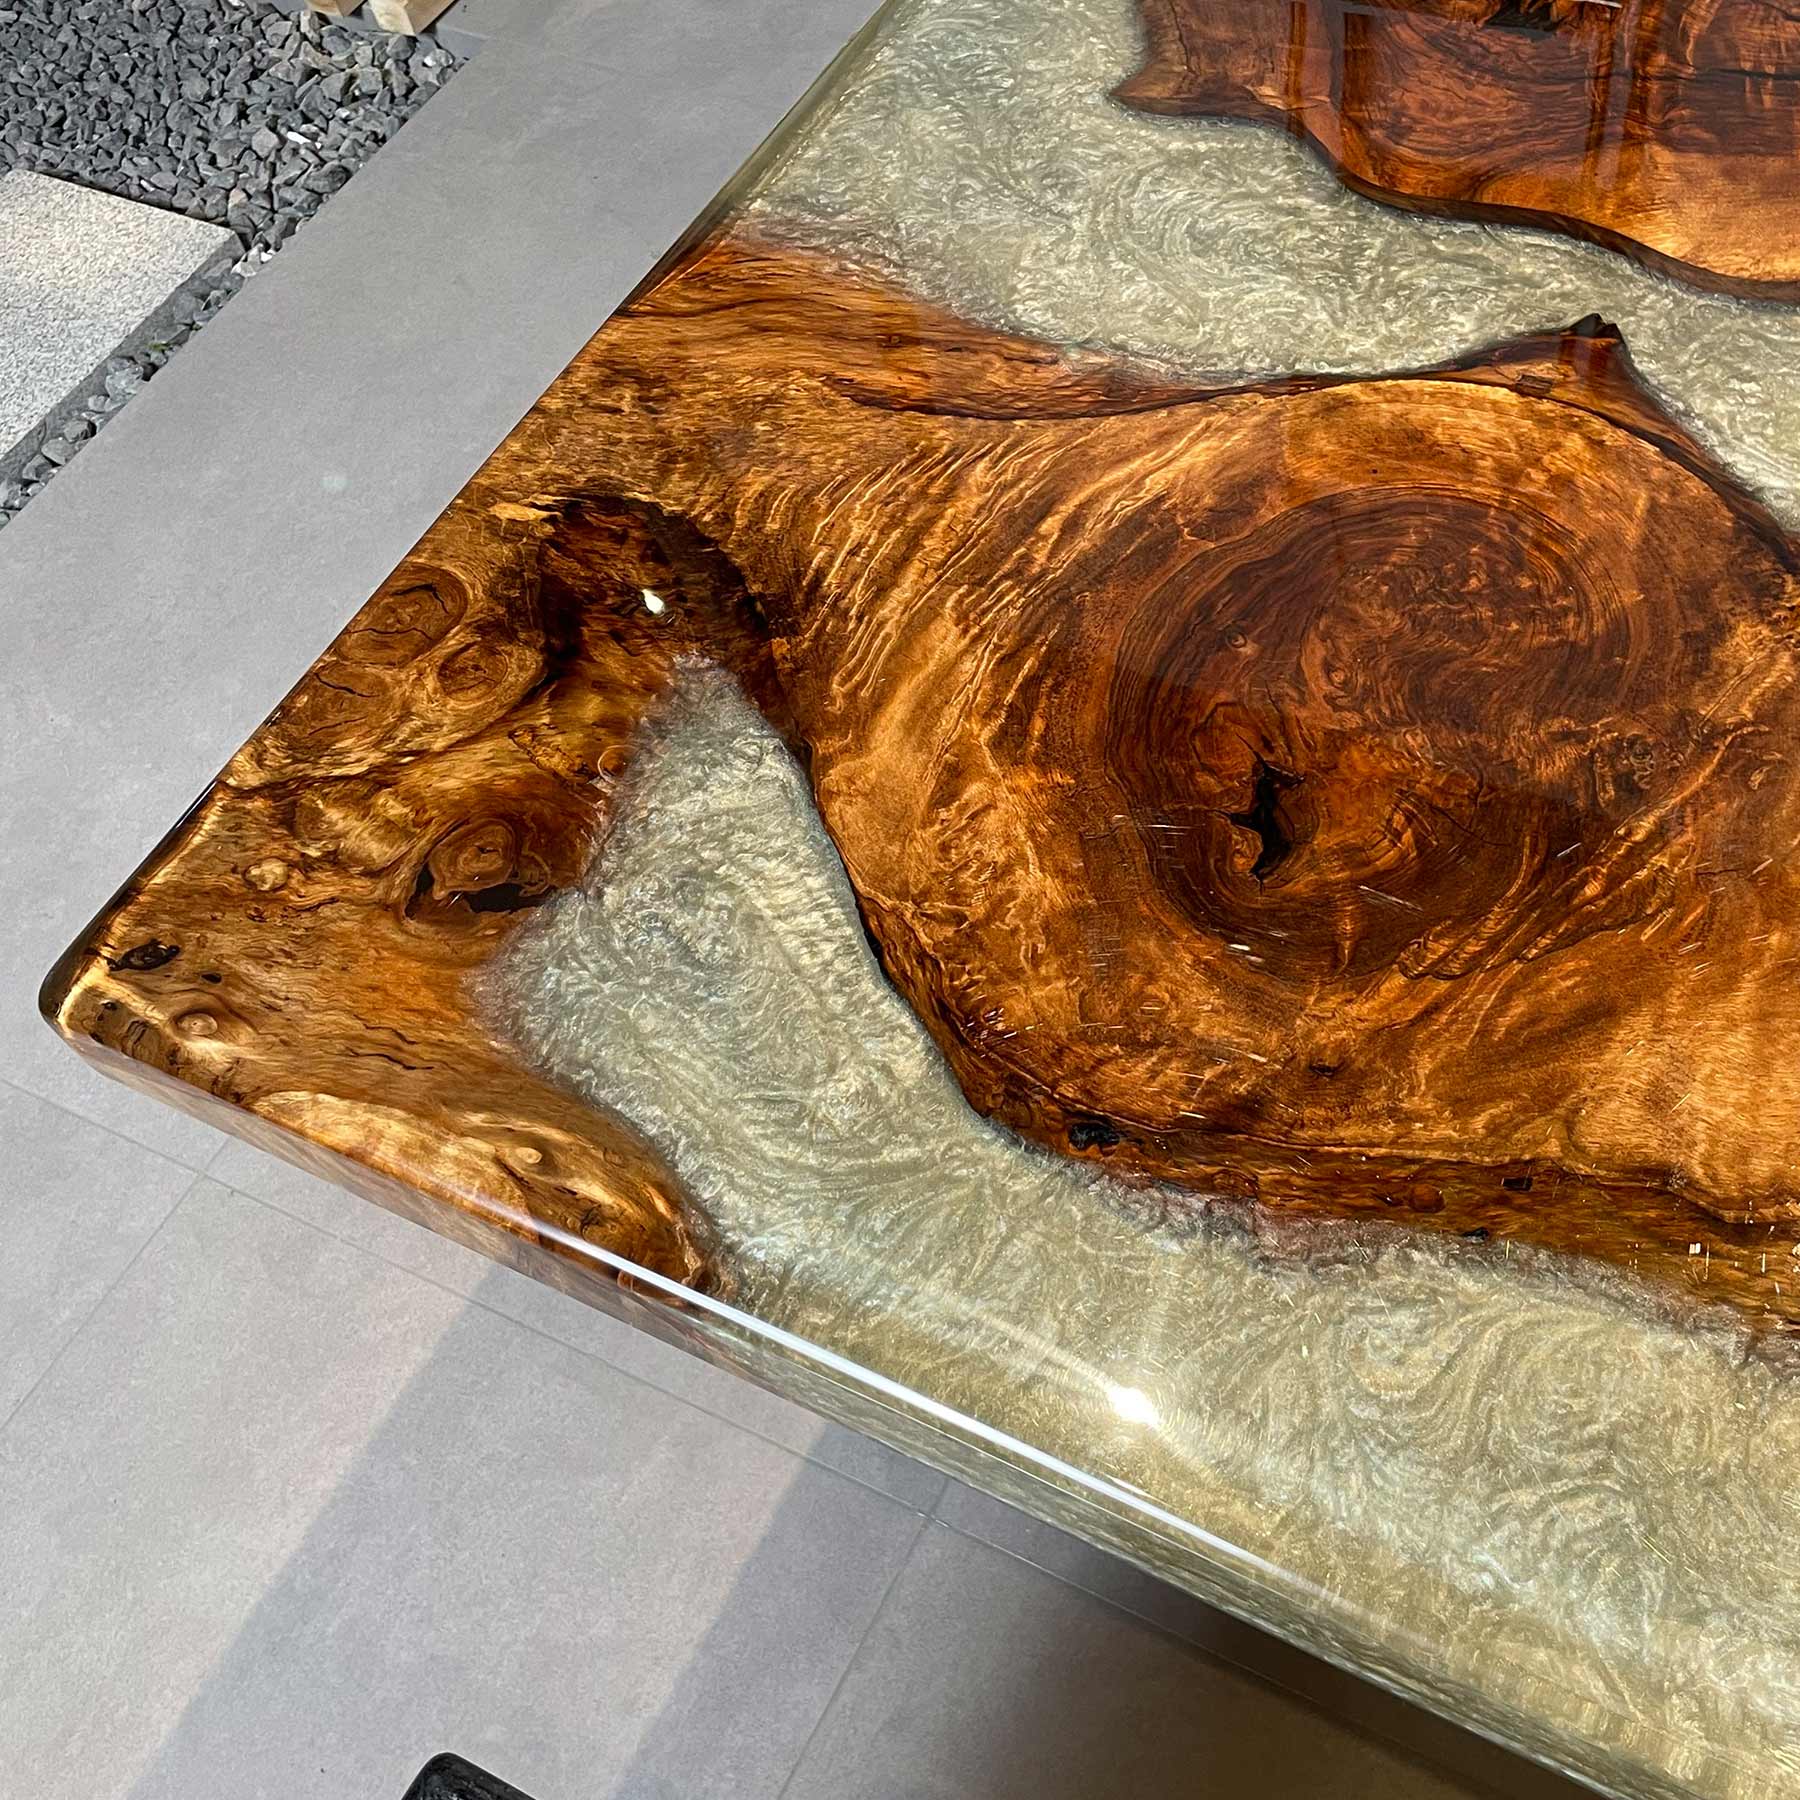
The KAZANAHOME Rectangular Black Walnut Wood Epoxy Resin Table is a true masterpiece, merging organic beauty with contemporary artistry. This epoxy table is crafted from hand-selected black walnut, celebrated for its rich textures and deep, earthy tones. A beautiful epoxy resin river flows through the wood, creating a stunning contrast between natural grain and modern gloss.
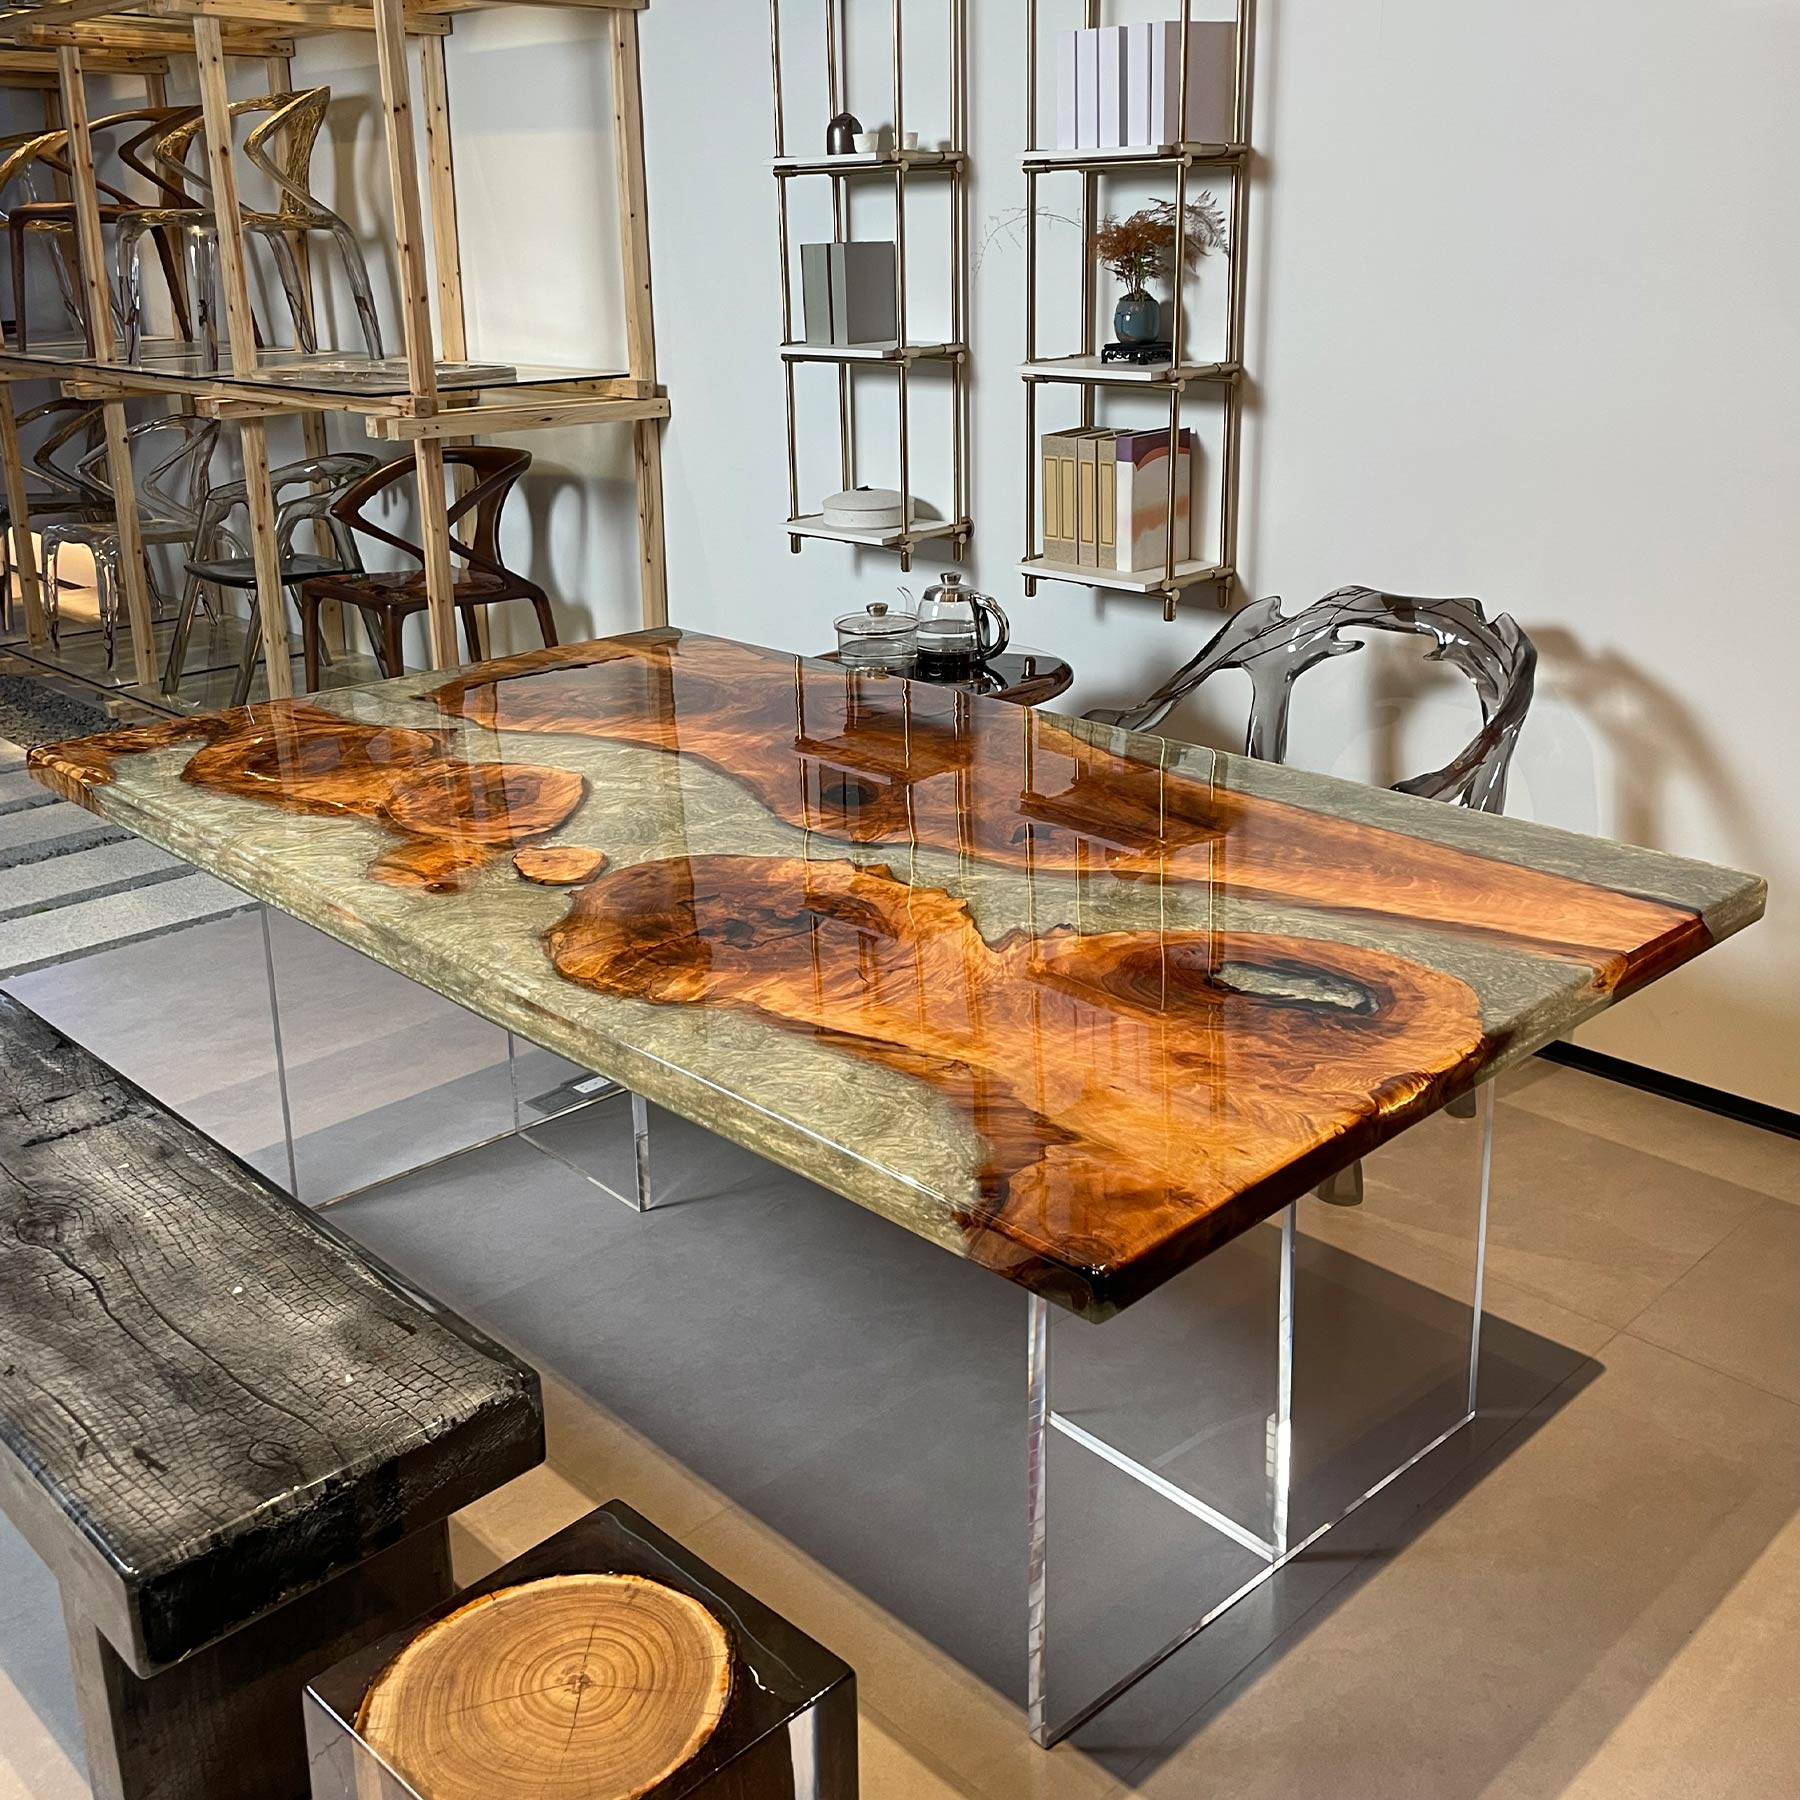
Designed to be both functional and visually striking, this epoxy resin wood table features a rectangular shape, offering ample surface space for dining, meetings, or stylish displays. The transparent epoxy finish enhances the wood’s natural texture, while also providing superior protection against moisture, heat, and daily wear. Whether placed in a dining room, executive office, or luxury living space, this wood epoxy table effortlessly elevates the ambiance with its sophisticated and artistic appeal.
We will provide a free set of metal table legs that you can choose to add to your order.
Specification:
- Wood Type: Black Walnut
- Materials: Epoxy, Epoxy Resin, Black Walnut
- Length: 83.97" (213.3cm)
- Width: 48.03" (122cm)
- Thickness: 1.96" (5cm)
- Edge Type: Straight Edges
- Drying Method: Kiln Dried
- Surfacing: Finished on 2 Sides
Common Use: Dining Table, Conference Table, Coffee Table, Sofa Table, Bar Countertop, Kitchen Countertop.
If you don't like the product style in the photos, we will produce the table of your dreams for you. From the beginning of production to the end, you will be with us every step of the way. We will request your confirmation on production details by sending you photos and videos of all the specifics, and we will proceed with production based on the details you approve. Therefore, by participating in the production story of your dining table, you will receive the product you desire, and your table will have more meaning to you.
Please contact us for a quote. or Design Your Own
Email:support@kazanahome.com
Free Curbside Shipping (Continental U.S.)
Kazana offer Free Curbside Shipping (Continental U.S.) on all orders within the United States (except Hawaii, Alaska, Puerto Rico, Canada,Remote Areas). Delivered to the customer's doorstep or downstairs by truck.
Expedited Shipping
Regarding additional cost for Expedited Shipping, please contact us, we will offer you the quotation within one business day. (Based on the dimension of the specific product and shipping address.)✉:support@kazanahome.com
We offer standard shipping for all orders. You can choose the standard shipping method on the Order Information page during the checkout process.Click to see more shipping info.
Returns & Refund
KAZANAHOME offers a 30-day standard return policy for most items. We also accept returns on damaged large or oversized items that ship via freight, as long as you report the damage within 5 days of delivery. View our full return policy.
Warranty and Maintenance
Maintenance:
Wipe Down the Epoxy Table with a Soft Sponge. The first step to taking care of your epoxy resin table is to wipe down the surface using a wet towel. If you want to perform a more in-depth cleaning of your epoxy resin table, use hot soapy water and a sponge to scrub away any build-up.
Warranty:
Kazanahome provides a 12-month warranty on all products, starting from the date of purchase.
This warranty applies under normal conditions of use but does not apply to any intentional or accidental damage or unreasonable use of our products.
Covered by warranty:
We can send accessories for free under warranty, such as paint or paraffin oil, and guide you on how to use them.
Not covered by warranty:
normal abrasion.
Damage caused by lack of proper care/maintenance.
Damage caused by external sources.
Any pet-related furniture damage
If there is a problem with the table you purchased, please contact us within 7 days of receipt. Email:support@kazanahome.com
Custom Wood & Epoxy Table Production Process
1. Wood Selection
Available Wood Types: Black Walnut, Golden Camphor, Cunninghamia, Walnut, Poplar, Ash, Olive Wood, and others.
Shape Options: Natural (raw edge) or custom-designed.
Natural Features: Knots, burl, grain patterns, cracks, end splits, mineral streaks, wormholes, resin pockets, and sap stains are preserved for character.
2. Wood & Color Confirmation
Clients confirm both wood type and color before production to ensure desired aesthetics.
3. CAD Design Approval
Our designer creates a detailed CAD drawing for client review and approval.
CAD drawings will be sent to you within 2 working days.
4. Material Preparation
Cleaning: Wood is thoroughly cleaned to remove impurities, enhancing texture (appearance may slightly change post-cleaning).
Edge Treatment: Natural edges may be lightly torched for refinement unless otherwise requested.
5. Resin Application (Bubble Reduction)
High-quality resin is applied to seal the wood, locking out bacteria and dust while minimizing bubbles.
6. Shaping & Trimming
Wood is precision-cut and shaped to meet design specifications.
7. Resin Degassing (Vacuum Process)
Resin is placed in a vacuum chamber for 30–60 minutes to eliminate air bubbles.
8. Layered Resin Pouring & Curing
Resin is poured in 3–5 layers (more for wave effects).
Each layer is torch-treated to remove bubbles and requires ~48 hours to cure (final layer may need additional time).
9. Demolding
Once fully cured, the piece is carefully removed from the mold.
10. Excess Wood Removal
Surfaces are sanded to remove protruding wood and achieve smoothness.
11. Multi-Stage Sanding & Lacquering
Sanding: Gradual polishing for a flawless finish.
Lacquering: Scratch-resistant lacquer is applied 5–6 times, sealing all gaps.
Pre-treatment: Thinner cleans the surface; brush-applied lacquer ensures deep absorption.
12. Quality Check & Resin Touch-Ups
Full inspection for imperfections. Resin gaps are filled, and raised areas are polished smooth.
13. Final Dust-Free Lacquering
A spray gun applies the last lacquer coat in a controlled, dust-free environment.
14. Packaging & Shipping
Protective Packaging Includes:
Pearl cotton wrap
Fabric layer
Reinforced cardboard
Edge guards with fabric strips
Custom wooden crate for secure transit
We fully understand the importance of stability, especially for families with children. All our tables come with sturdy legs - either pre-drilled or designed for easy installation - to ensure safety and durability. Should a customer receive a product that doesn't meet these standards, please understand this would be an exception rather than the norm.
Metal Table Leg Installation Instructions:
Step 1: Install the legs first.
Step 2: Attach the adjustable foot pads.
Step 3: Install the suction cups.
Step 4: Place a 6mm felt pad.
Step 5: Level the bottom foot pads to ensure all three touch the ground evenly.
Step 6: If there is a gap between the tabletop and legs, use thin shims to balance it.
Other table leg installation instructions:
If you choose solid wood legs, acrylic legs, or solid wood & acrylic legs, simply adjust the distance between the legs, place the tabletop on them, and use the included thin shims to balance if there is any gap between the tabletop and legs.
Please do not use screws to drill holes in the table.
If resin cracking occurs due to improper handling, the customer will be responsible for any resulting issues.
If you need a table leg installation video, please feel free to contact us:
:support@kazanahome.com
FAQ
Issues that customers are more concerned about
We are aware that shipping can sometimes lead to packaging damage, but we take extra precautions to protect our products. We use reinforced packaging and secure padding to minimize any risks. If, for any reason, the packaging arrives damaged, we encourage customers to inspect the item upon arrival and report any issues so we can promptly address them.
We fully understand the importance of stability, especially for families with children. All our tables come with sturdy legs - either pre-drilled or designed for easy installation - to ensure safety and durability. Should a customer receive a product that doesn't meet these standards, please understand this would be an exception rather than the norm.
Metal Table Leg Installation Instructions:
Step 1: Install the legs first.
Step 2: Attach the adjustable foot pads.
Step 3: Install the suction cups.
Step 4: Place a 6mm felt pad.
Step 5: Level the bottom foot pads to ensure all three touch the ground evenly.
Step 6: If there is a gap between the tabletop and legs, use thin shims to balance it.
Other table leg installation instructions:
If you choose solid wood legs, acrylic legs, or solid wood & acrylic legs, simply adjust the distance between the legs, place the tabletop on them, and use the included thin shims to balance if there is any gap between the tabletop and legs.
Please do not use screws to drill holes in the table.
If resin cracking occurs due to improper handling, the customer will be responsible for any resulting issues.
If you need a table leg installation video, please feel free to contact us:support@kazanahome.com
Other
You can contact us through our contact page! We will be happy to assist you.