


Kazanahome
Coastal Walnut Wood Countertop Epoxy Table - Breathtaking Centerpiece for Oceanfront Homes CT67
How Customization Works
From order to design to delivery, we will keep you updated on your order's progress every step of the way.

Step 1: Order Online
Choose your preferences: Choose your preferences: Select your table shape, wood type, size, and so on.
Place Your Order: Apply your discount code at checkout.

Step 2: Wood Design
Wood Selection: Carefully chosen, all-natural wood.
CAD Design: CAD drawings will be sent to you within 24-48 hours.

Step 3: Production
Complete Transparency: We'll share photos and videos with you at every stage of the crafting process.

Step 4: Finished Table
Before delivery: We verify that the finished product is exactly as you envisioned.

Step 5: Shipping & Delivery
Packed with the utmost care and delivered safely to your doorstep.
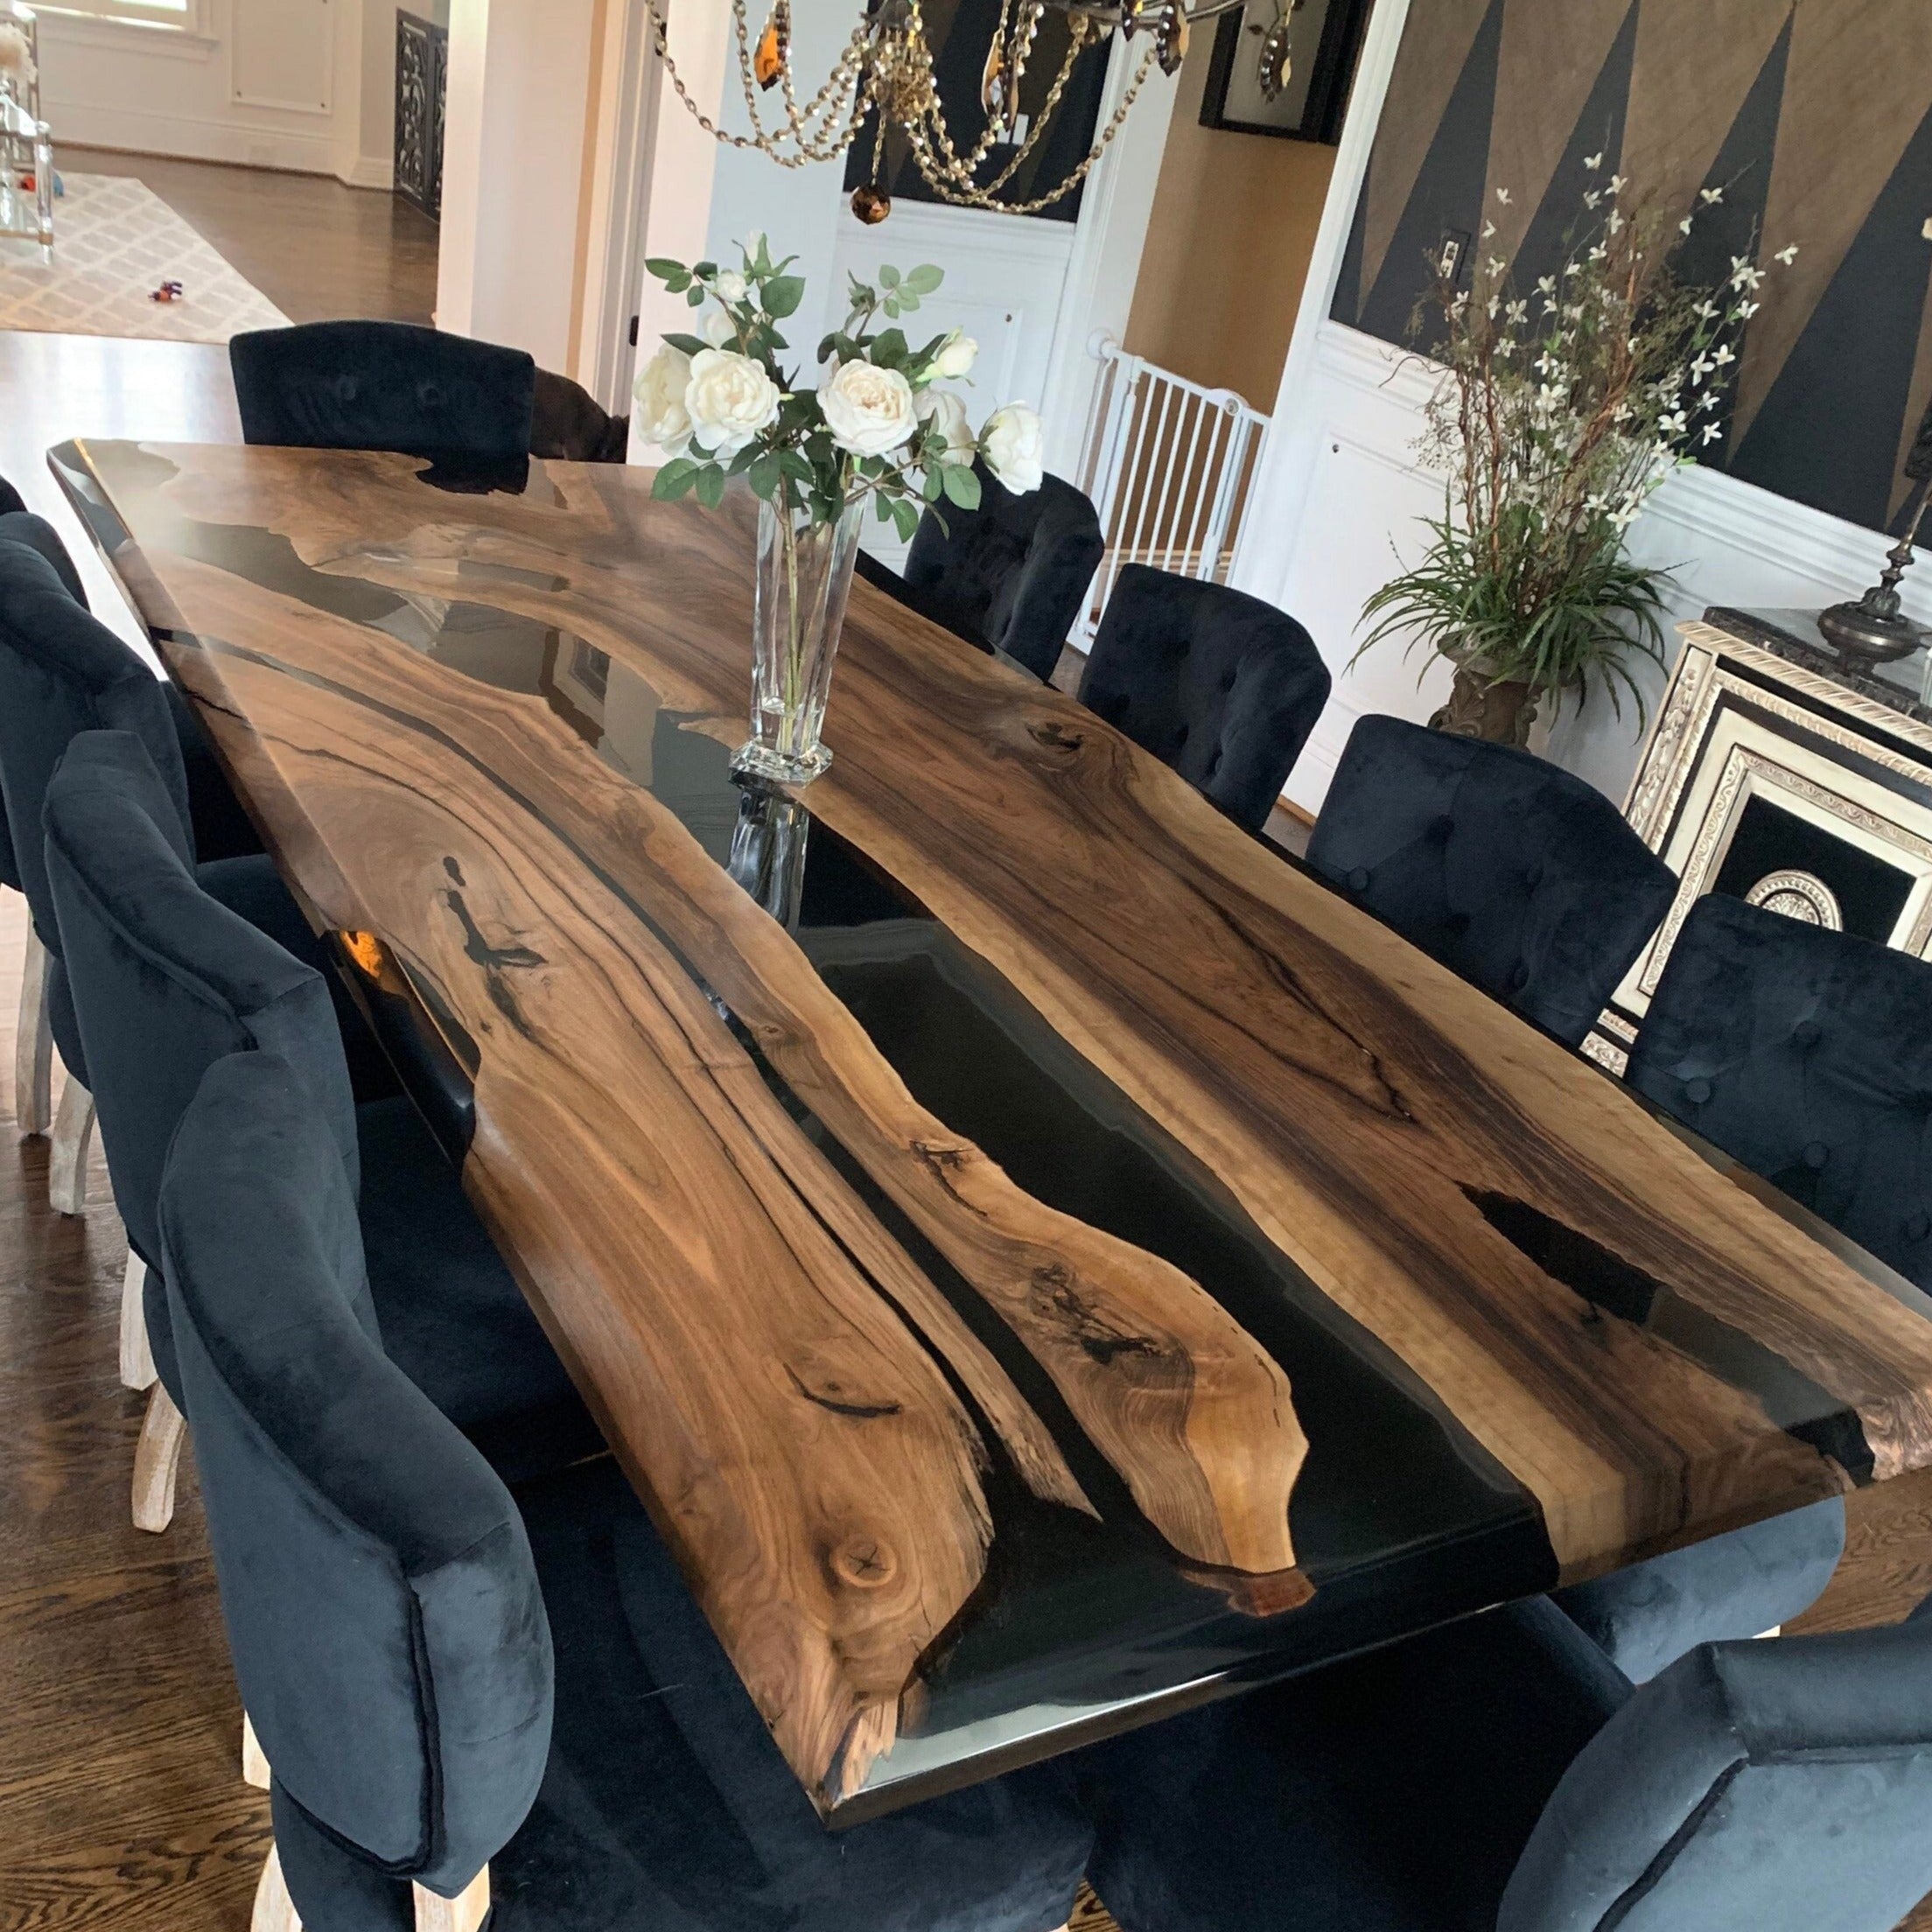
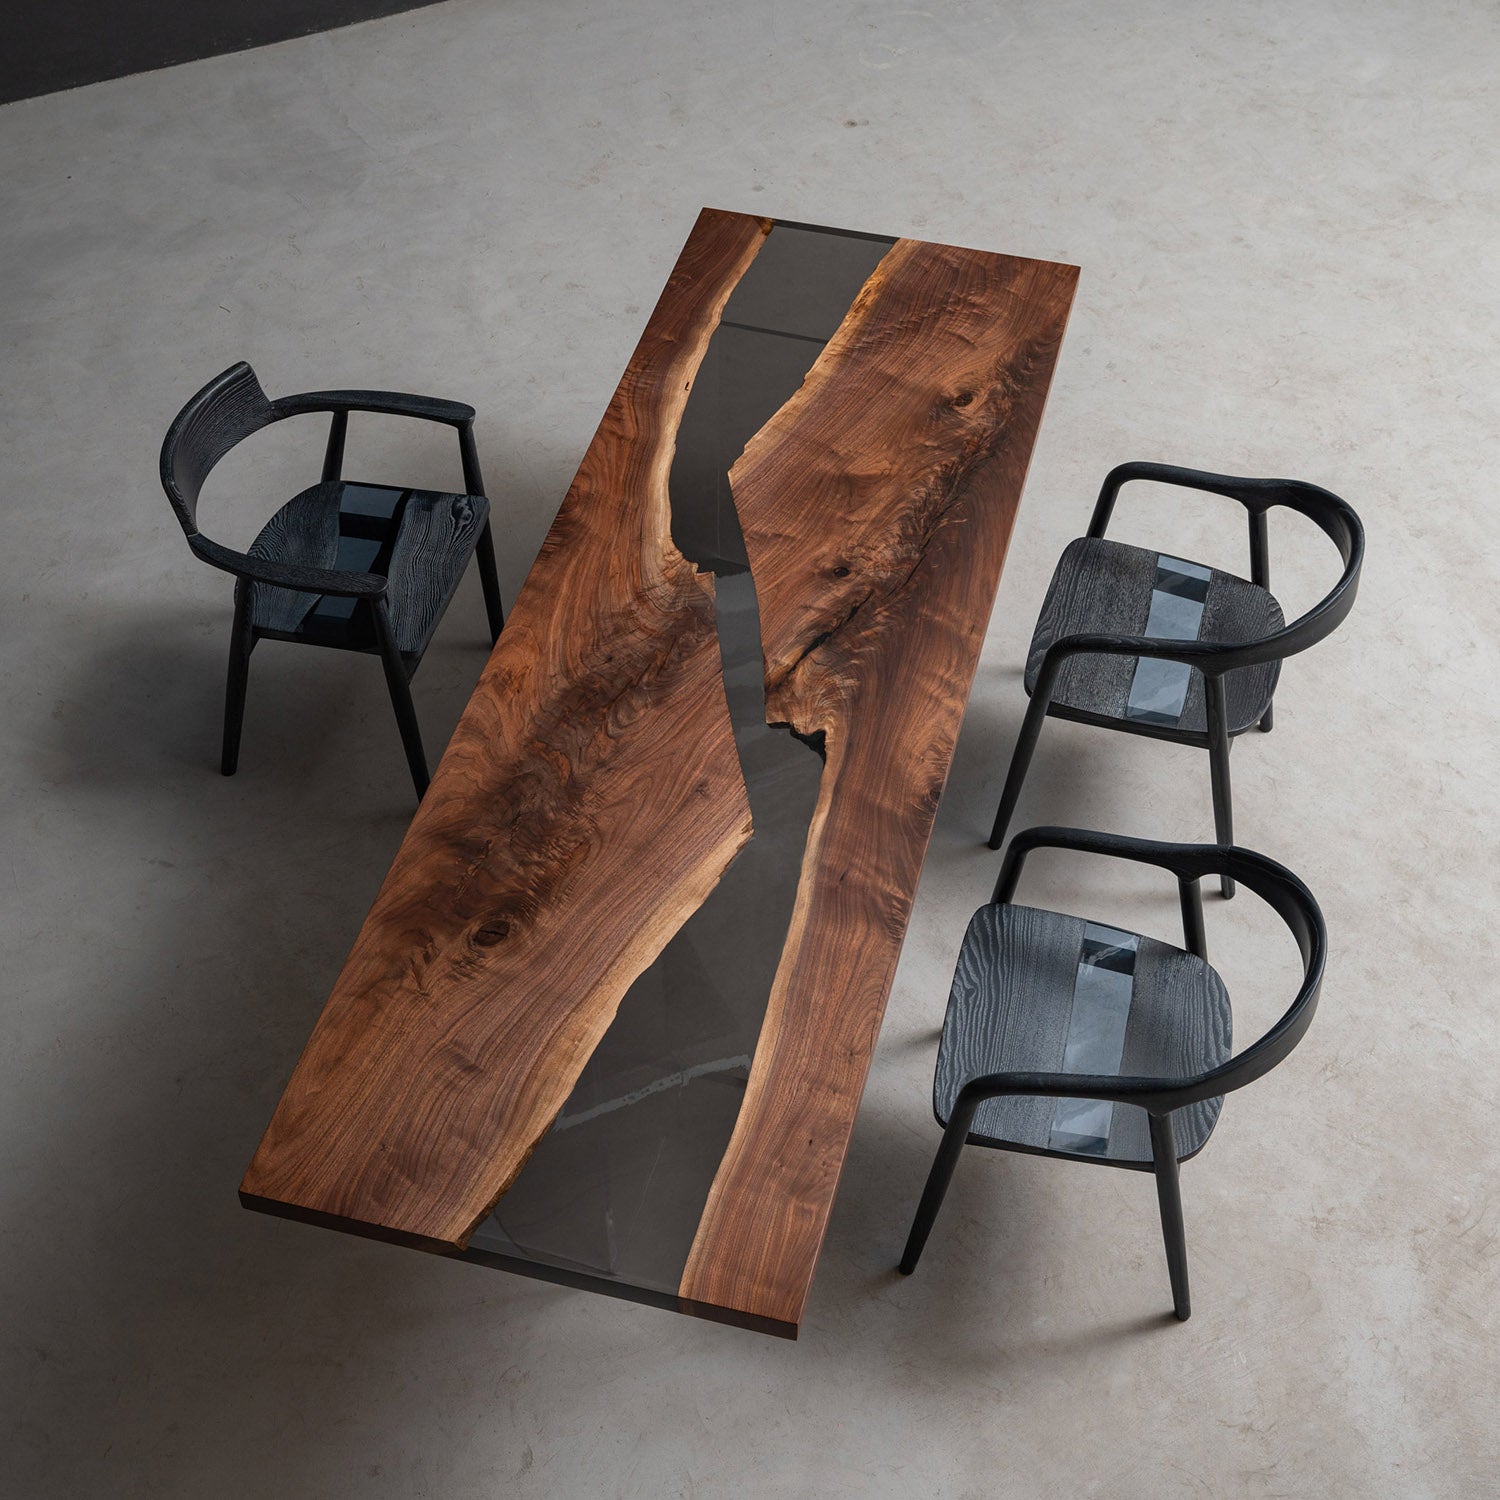
The Ocean River Masterpiece: Custom Black Walnut Epoxy Table
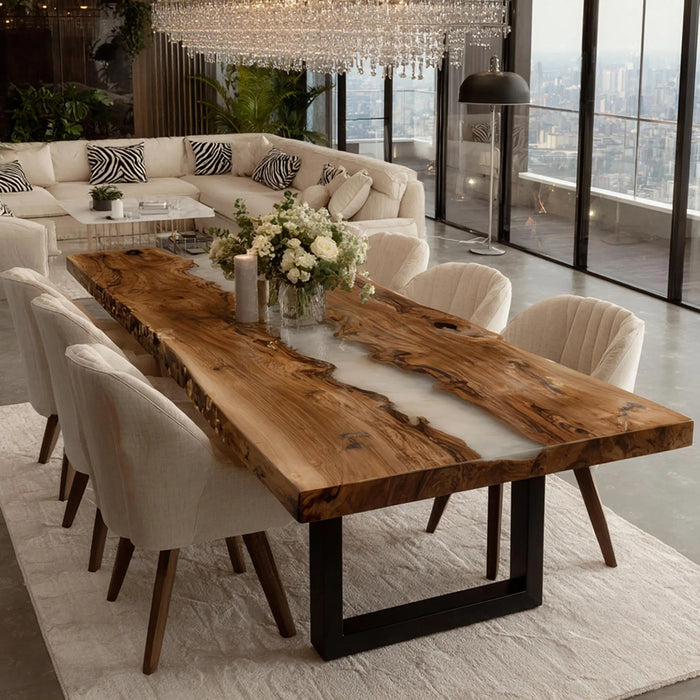
Reimagining the gathering spaces of the sophisticated home, this epoxy countertop table seamlessly elevates a standard kitchen hub or a sprawling dining zone. It is meticulously crafted to anchor your open-concept great room, transforming it into a luminous, gallery-worthy focal point for entertaining.
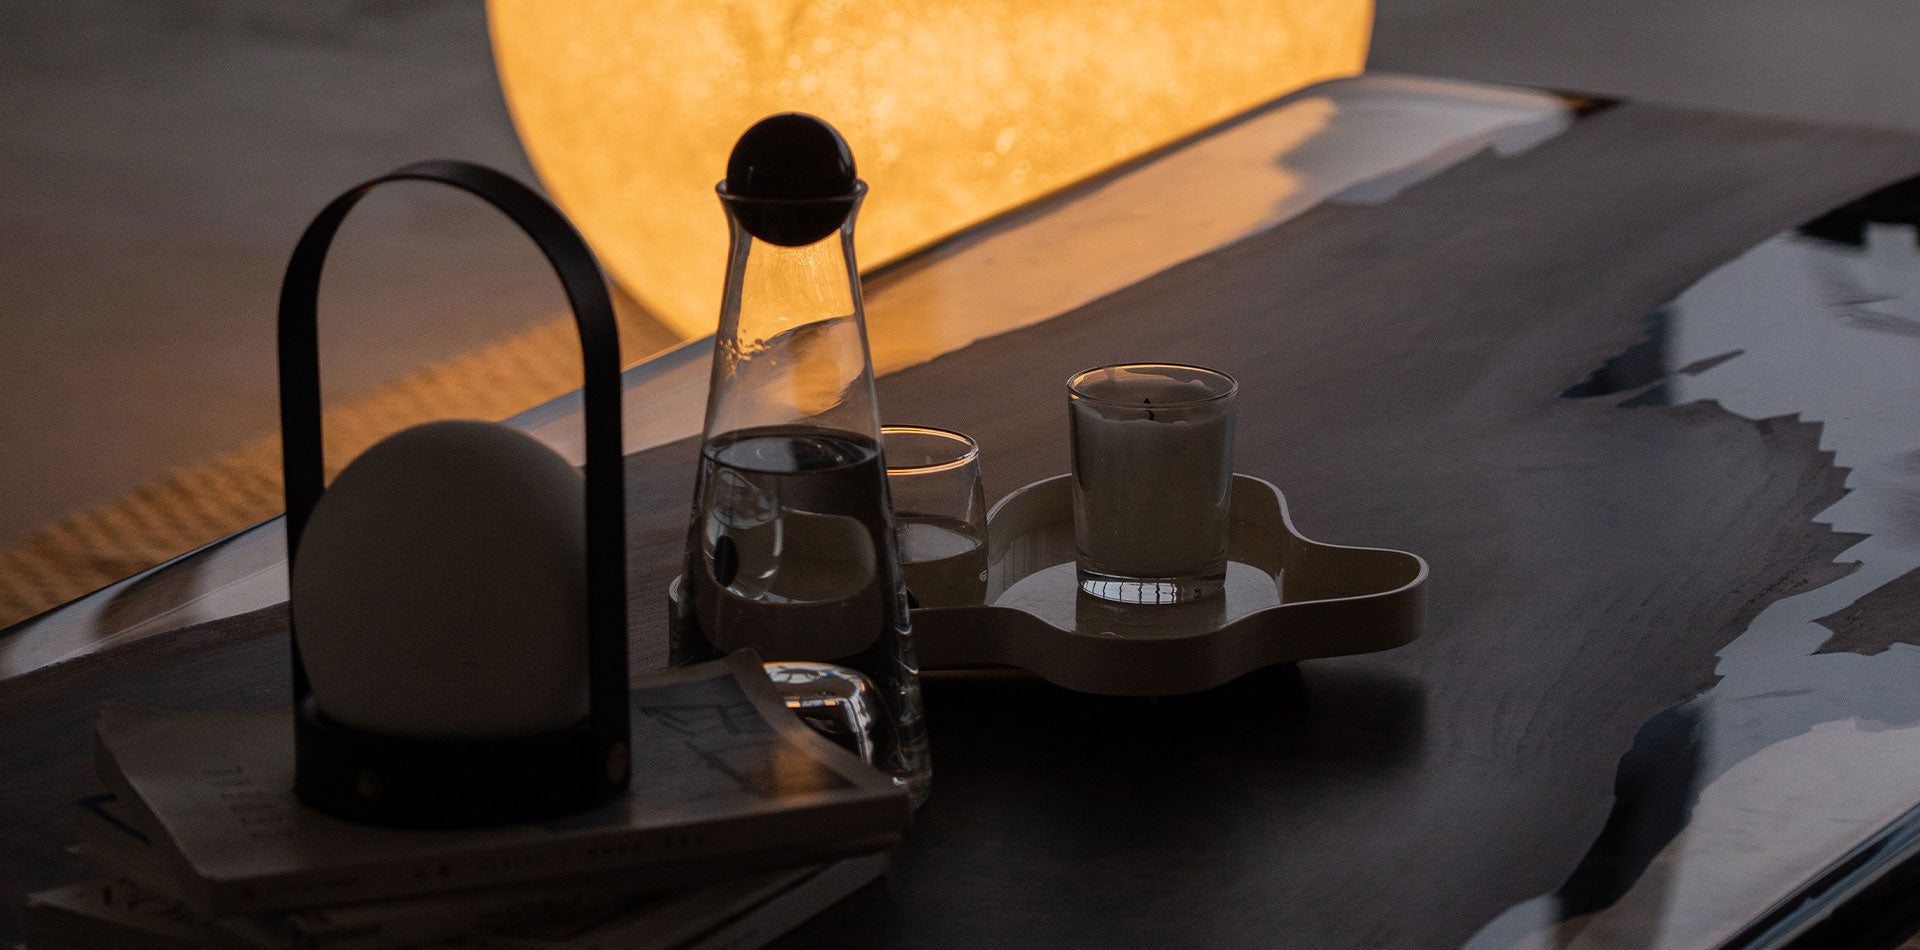
This hand-poured resin of the walnut epoxy countertop table is artistically embedded with swirling white accents that perfectly mimic crashing ocean foam and organic wave movement, creating a striking visual anchor that captures light dynamically throughout the day.
-
Solid Timber Core: Crafted from 100% authentic, sustainably sourced solid Black Walnut (no veneers or composite cores).
-
Advanced Spill-Resistant Surface: The entire top surface is completely non-porous and spill-resistant.
- Effortless Maintenance & Hygiene: Because the surface repels stains and standing liquids.
Blending artistic ocean-inspired design with everyday durability, this custom ocean epoxy table creates a stunning focal point built for modern coastal living. Perfect for beach homes in Miami, San Diego, Malibu, Charleston, and the Florida Keys, it brings the calm, natural beauty of the sea into your kitchen or dining space—while standing up to daily use with style and strength.
We've priced your favorite size options, but if those sizes don't suit you, you can also fill in your requirements directly at the "Custom Your Own" page, we will contact you as soon as possible. Looking forward to working with you! Our email: support@kazanahome.com
At Kazanahome, we embrace nature's artistry in every creation.
Since we exclusively use natural wood and resin, each epoxy table is a unique masterpiece that cannot be replicated to match reference images exactly. The soul of your table lies in its distinctive grain patterns, organic textures, and the story of the wood itself - shaped by years of growth under varying sunlight, climate, and soil conditions. Even within the same tree, no two sections share identical characteristics.
We honor this natural legacy. Our master craftsmen (with 20+ years of expertise) meticulously select materials to showcase wood's authentic beauty - preserving every knot, crack, and mineral streak as nature's signature. We deliberately avoid over-processing, because true elegance comes not from perfection, but from the poetry of imperfections shaped by time.
By collaborating with us, you’re not just buying a epoxy table—you’re creating a personal heirloom. Your 100% handmade wood epoxy resin table will be uniquely yours, a functional work of art crafted for your home.
More info: How to order, Manufacturing Process, Contact us, FAQ
From Design to Delivery – We’ll keep you updated every step of your order
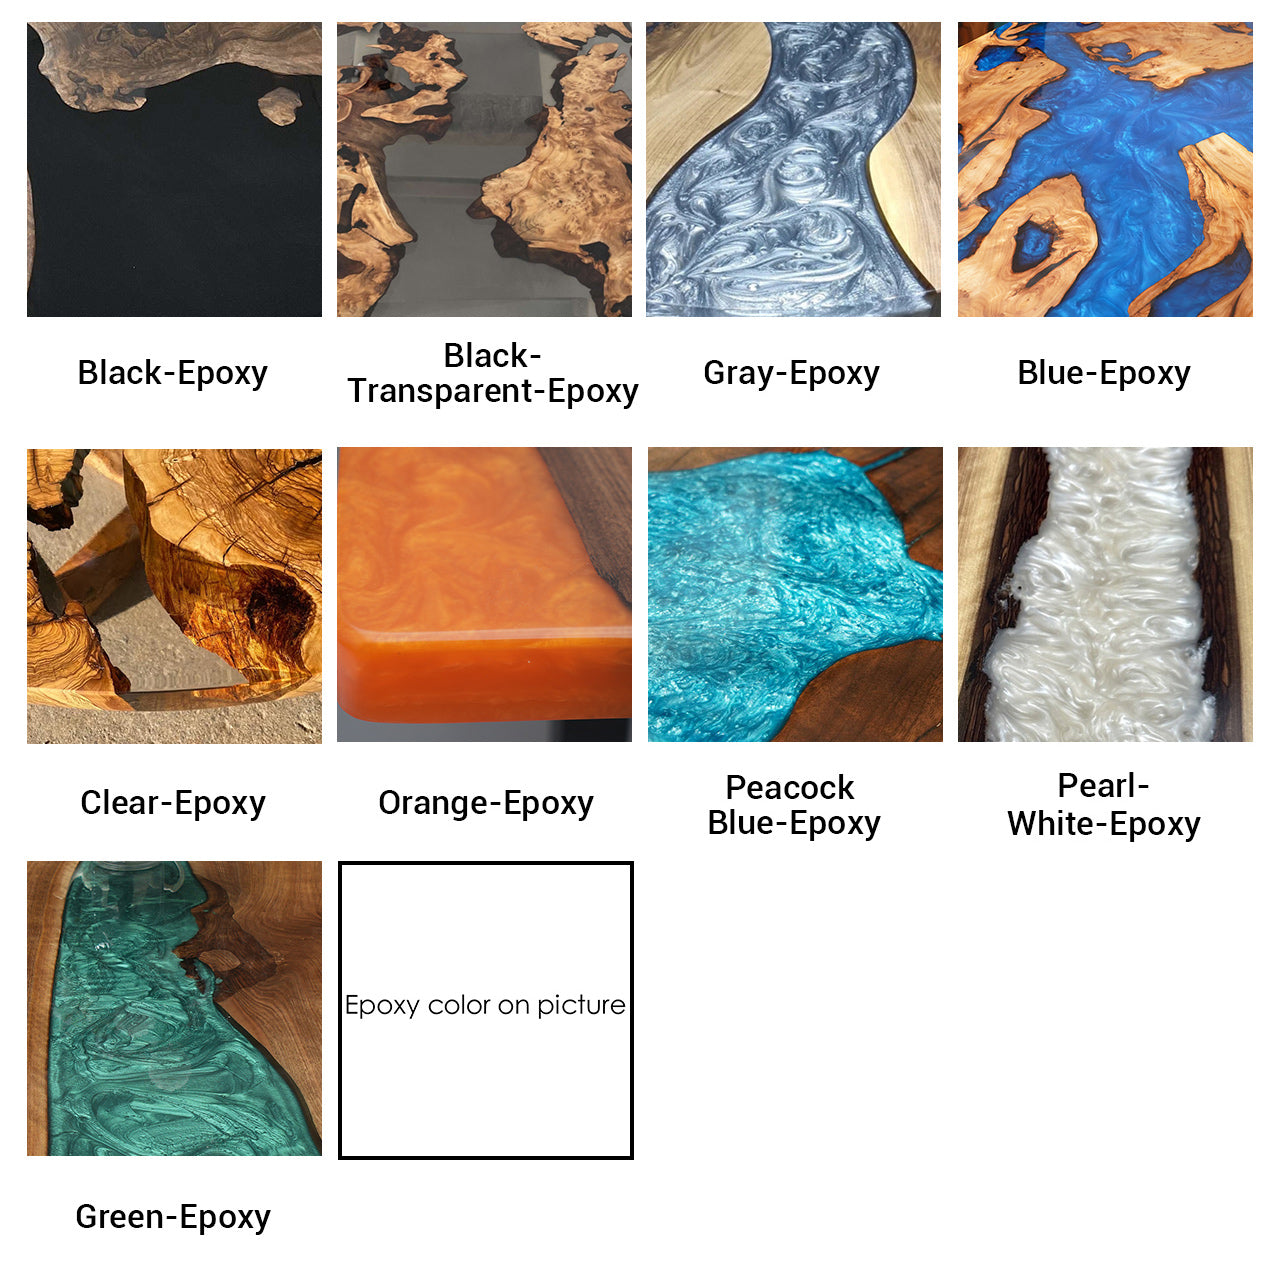
Choose your preferences: Select your table shape, wood type, size, epoxy color, table edge, table finish, table legs from the product list options.
Place Your Order: Apply your discount code at checkout.
Design Approval: Our master craftsmen with over 20 years of experience will carefully select all-natural wood, and our designers will provide sketches for your approval (Note: The resin colors in the sketches are for layout purposes only; we will use the exact shade you selected).
CAD drawings will be sent to you within 24-48 hours.
Transparent Production: We’ll share photos/videos at every stage, ensuring the final product meets your expectations before shipping.
Each customer's design is unique. The following drawings are for reference only. The final design will be created by our professional designers based on the order.


Free Curbside Shipping (Continental U.S.)
Kazana offer Free Curbside Shipping (Continental U.S.) on all orders within the United States (except Hawaii, Alaska, Puerto Rico, Canada,Remote Areas). Delivered to the customer's doorstep or downstairs by truck.
Expedited Shipping
Regarding additional cost for Expedited Shipping, please contact us, we will offer you the quotation within one business day. (Based on the dimension of the specific product and shipping address.)✉:support@kazanahome.com
We offer standard shipping for all orders. You can choose the standard shipping method on the Order Information page during the checkout process.Click to see more shipping info.
Returns & Refund
KAZANAHOME offers a 30-day standard return policy for most items. We also accept returns on damaged large or oversized items that ship via freight, as long as you report the damage within 5 days of delivery. View our full return policy.
Maintenance:
Wipe Down the Epoxy Table with a Soft Sponge. The first step to taking care of your epoxy resin table is to wipe down the surface using a wet towel. If you want to perform a more in-depth cleaning of your epoxy resin table, use hot soapy water and a sponge to scrub away any build-up.
Warranty:
Kazanahome provides a 12-month warranty on all products, starting from the date of purchase.
This warranty applies under normal conditions of use but does not apply to any intentional or accidental damage or unreasonable use of our products.
Covered by warranty:
We can send accessories for free under warranty, such as paint or paraffin oil, and guide you on how to use them.
Not covered by warranty:
normal abrasion.
Damage caused by lack of proper care/maintenance.
Damage caused by external sources.
Any pet-related furniture damage
If there is a problem with the table you purchased, please contact us within 7 days of receipt. Email:support@kazanahome.com
Custom Wood & Epoxy Table Production Process
1. Wood Selection
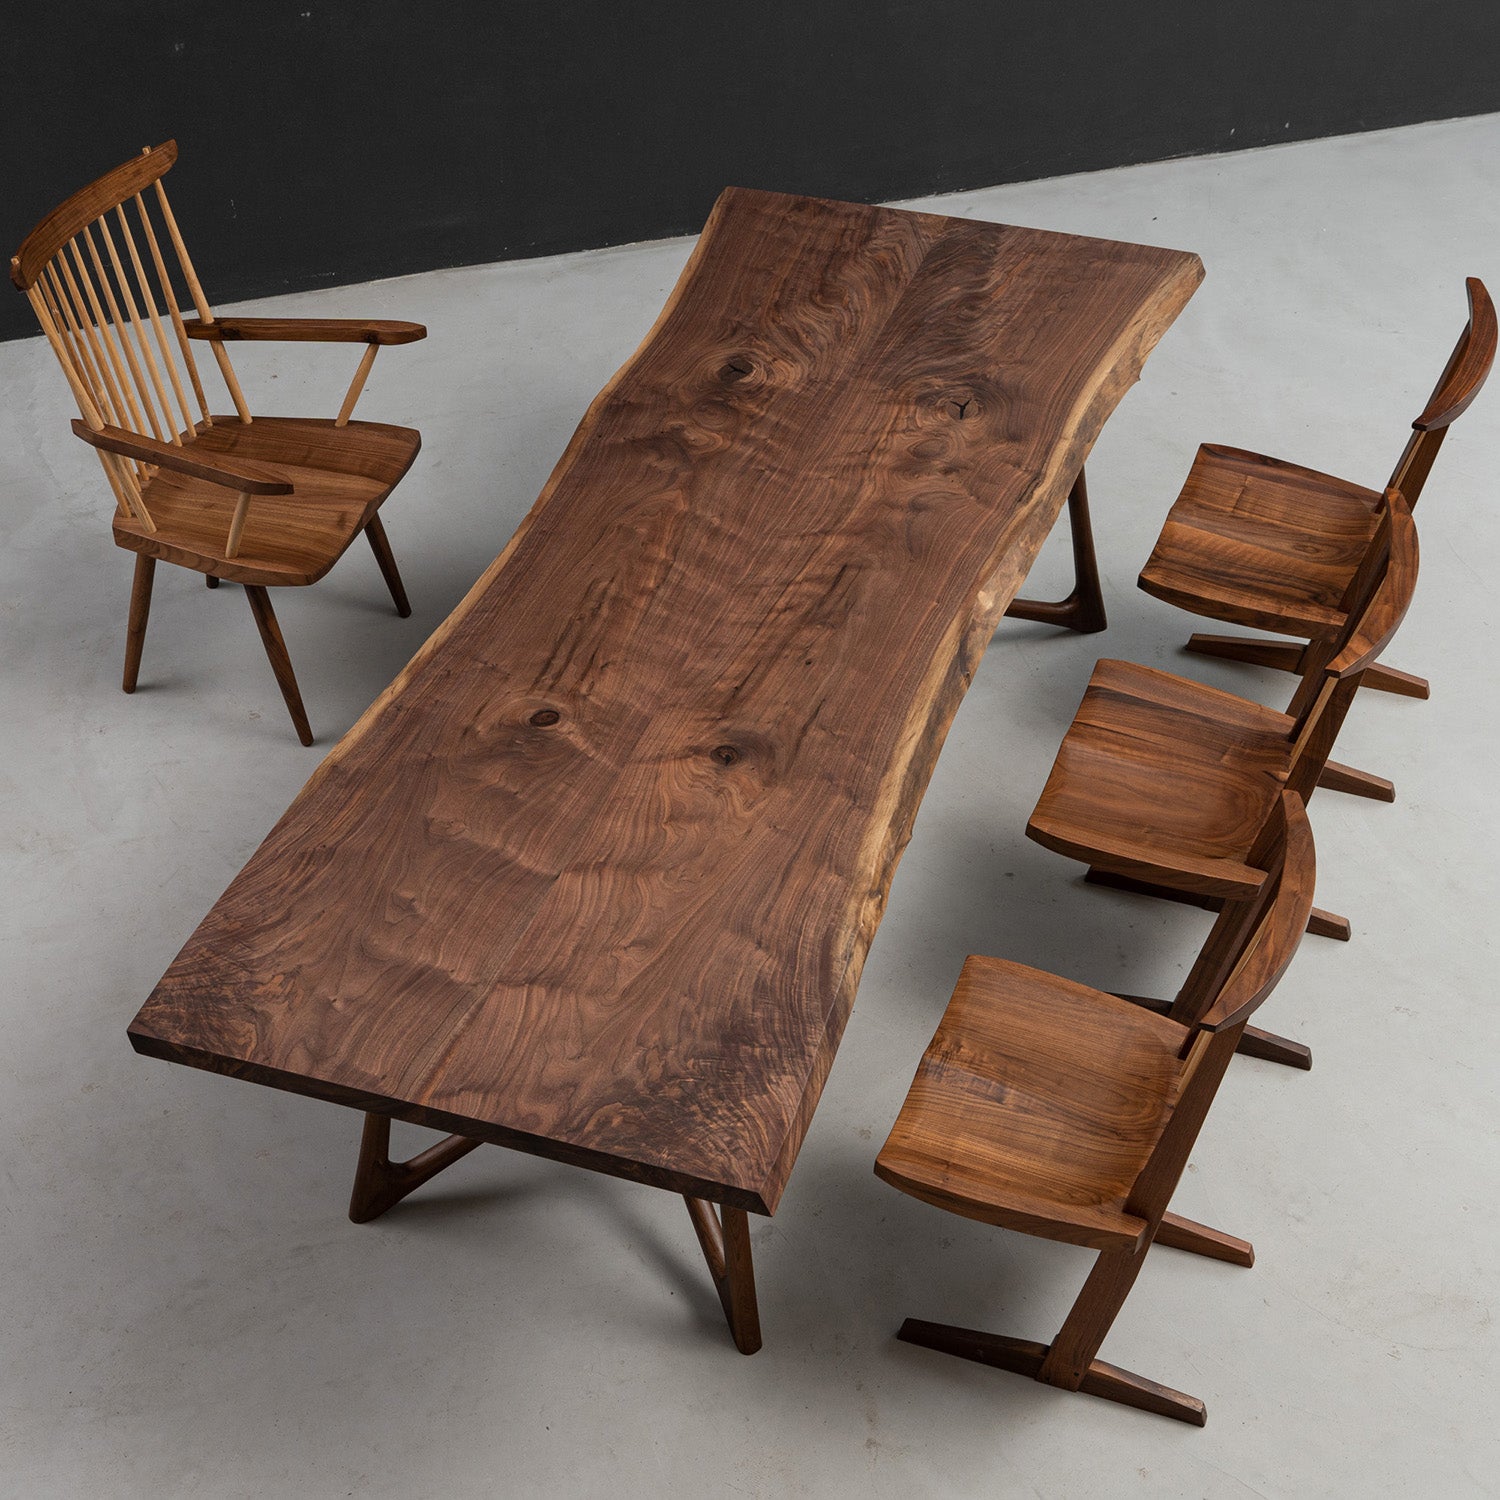
Available Wood Types: Black Walnut, Golden Camphor, Cunninghamia, Walnut, Poplar, Ash, Olive Wood, and others.
Shape Options: Natural (raw edge) or custom-designed.
Natural Features: Knots, burl, grain patterns, cracks, end splits, mineral streaks, wormholes, resin pockets, and sap stains are preserved for character.
2. Wood & Color Confirmation
Clients confirm both wood type and color before production to ensure desired aesthetics.
3. CAD Design Approval
Our designer creates a detailed CAD drawing for client review and approval.
CAD drawings will be sent to you within 2 working days.
4. Material Preparation
Cleaning: Wood is thoroughly cleaned to remove impurities, enhancing texture (appearance may slightly change post-cleaning).
Edge Treatment: Natural edges may be lightly torched for refinement unless otherwise requested.
5. Resin Application (Bubble Reduction)
High-quality resin is applied to seal the wood, locking out bacteria and dust while minimizing bubbles.
6. Shaping & Trimming
Wood is precision-cut and shaped to meet design specifications.
7. Resin Degassing (Vacuum Process)
Resin is placed in a vacuum chamber for 30–60 minutes to eliminate air bubbles.
8. Layered Resin Pouring & Curing
Resin is poured in 3–5 layers (more for wave effects).
Each layer is torch-treated to remove bubbles and requires ~48 hours to cure (final layer may need additional time).
9. Demolding
Once fully cured, the piece is carefully removed from the mold.
10. Excess Wood Removal
Surfaces are sanded to remove protruding wood and achieve smoothness.
11. Multi-Stage Sanding & Lacquering
Sanding: Gradual polishing for a flawless finish.
Lacquering: Scratch-resistant lacquer is applied 5–6 times, sealing all gaps.
Pre-treatment: Thinner cleans the surface; brush-applied lacquer ensures deep absorption.
12. Quality Check & Resin Touch-Ups
Full inspection for imperfections. Resin gaps are filled, and raised areas are polished smooth.
13. Final Dust-Free Lacquering
A spray gun applies the last lacquer coat in a controlled, dust-free environment.
14. Packaging & Shipping
Protective Packaging Includes:
Pearl cotton wrap
Fabric layer
Reinforced cardboard
Edge guards with fabric strips
Custom wooden crate for secure transit
We fully understand the importance of stability, especially for families with children. All our tables come with sturdy legs - either pre-drilled or designed for easy installation - to ensure safety and durability. Should a customer receive a product that doesn't meet these standards, please understand this would be an exception rather than the norm.
Metal Table Leg Installation Instructions:
Step 1: Install the legs first.
Step 2: Attach the adjustable foot pads.
Step 3: Install the suction cups.
Step 4: Place a 6mm felt pad.
Step 5: Level the bottom foot pads to ensure all three touch the ground evenly.
Step 6: If there is a gap between the tabletop and legs, use thin shims to balance it.
Other table leg installation instructions:
If you choose solid wood legs, acrylic legs, or solid wood & acrylic legs, simply adjust the distance between the legs, place the tabletop on them, and use the included thin shims to balance if there is any gap between the tabletop and legs.
Please do not use screws to drill holes in the table.
If resin cracking occurs due to improper handling, the customer will be responsible for any resulting issues.
If you need a table leg installation video, please feel free to contact us:
:support@kazanahome.com
Size Guide
Check out our Size Guide, organized by shape, to help you easily find the perfect fit.
Whether you're selecting an epoxy dining table for family gatherings, a coffee table for your living room, a standout conference table for your meeting space, or a custom bar table for a social area, we're here to help you find the ideal dimensions. Based on your space and needs, you can choose from a variety of shapes—including rectangle, round, and oval—to ensure every piece fits seamlessly into your environment.


FAQ
Issues that customers are more concerned about
We are aware that shipping can sometimes lead to packaging damage, but we take extra precautions to protect our products. We use reinforced packaging and secure padding to minimize any risks. If, for any reason, the packaging arrives damaged, we encourage customers to inspect the item upon arrival and report any issues so we can promptly address them.
We fully understand the importance of stability, especially for families with children. All our tables come with sturdy legs - either pre-drilled or designed for easy installation - to ensure safety and durability. Should a customer receive a product that doesn't meet these standards, please understand this would be an exception rather than the norm.
Metal Table Leg Installation Instructions:
Step 1: Install the legs first.
Step 2: Attach the adjustable foot pads.
Step 3: Install the suction cups.
Step 4: Place a 6mm felt pad.
Step 5: Level the bottom foot pads to ensure all three touch the ground evenly.
Step 6: If there is a gap between the tabletop and legs, use thin shims to balance it.
Other table leg installation instructions:
If you choose solid wood legs, acrylic legs, or solid wood & acrylic legs, simply adjust the distance between the legs, place the tabletop on them, and use the included thin shims to balance if there is any gap between the tabletop and legs.
Please do not use screws to drill holes in the table.
If resin cracking occurs due to improper handling, the customer will be responsible for any resulting issues.
If you need a table leg installation video, please feel free to contact us:support@kazanahome.com
Our finish is long-lasting. When cleaning the epoxy table, we recommend wiping it with only a soft, damp cloth and avoiding any harsh chemicals. If stains remain, we suggest using mild, natural soap to remove surface residue.
We recommend maintaining normal indoor humidity and temperature, as excessively dry conditions may damage the table. So California's climate is very friendly to epoxy resin, with moderate and stable humidity. However, California also has its unique challenges, so special attention is needed—avoid direct sunlight.
As long as you protect it from sun exposure, your epoxy table can last for many years.
Wood constantly expands and contracts with changes in temperature and humidity. The presence of knots, cracks, insect marks, and other natural characteristics in wood is a normal phenomenon. Usually, these wood features do not affect its structural integrity. We may fill them with epoxy resin or leave them as they are. Larger cracks are repaired using butterfly keys and epoxy resin.
Since every piece of wood is unique, it is normal for each epoxy resin table to exhibit some imperfections. Precisely because each epoxy resin table is one-of-a-kind, the photos you see online are of finished tables we have previously created. Therefore, you will need to customize your own epoxy resin table. Your custom product will be similar to the photos, but the wood grain, color, and natural features will differ. No two tables are ever exactly the same.
Temperature and humidity are important factors when using an epoxy table. When used indoors under normal conditions and kept strictly out of direct sunlight, your epoxy table will remain highly durable and aesthetically pleasing. An epoxy resin table is not just a piece of furniture—it is also a work of art.
Epoxy tables are suitable for use in many states across the United States. For example, Nevada, Oregon, Arizona, and California offer stable climates, which is an advantage. However, intense ultraviolet (UV) rays remain the biggest challenge. As long as you take proper measures to protect it from sun exposure, your table can accompany you for many years to come.
We source our wood as locally as possible. We make every effort to procure black walnut, walnut, oak, poplar, ash, olive wood, and other local species from states such as California, Pennsylvania, Nevada, and New York to minimize our carbon footprint. We partner with local sawmills that specialize in unique slab and lumber specifications and also source the highest grade of dimensional lumber from regional mills. Additionally, we reclaim wood from local logging operations. All wood is dried in our state-of-the-art vacuum drying kiln, which allows the wood to dry evenly from the inside out, reducing the likelihood of future cracking or warping.
As a US based company, we offer:
Free standard shipping within the continental United States. If customers require expedited shipping, additional charges will apply for the expedited service.
Our free delivery service does not include installation. If customers wish to add white-glove installation service, please provide us with your delivery address, and we will provide a quote for the white-glove service.
If you’re not completely happy with your epoxy table when you see it before shipment, please let us know within 24 hours and share the changes you’d like. We’ll review your request and see what modifications can be made. Please note that changes cannot be accommodated after the 24-hour window.
We do support changes to custom details, but it’s always best to finalize everything during the drawing confirmation stage. Once production has started, modifications depend on the situation. For example, if the resin has already cured, unfortunately, changes can’t be made.
Our tables are generally very durable and resistant to scratches. Scratches are extremely rare and typically only happen if sharp objects are used or excessive force is applied during handling.
If your table happens to get scratched, don’t worry. Just send us an email with a photo showing the scratch, and our after-sales team will provide the best solution based on your specific situation.
Alternatively, you can click directly to this blog post to read the relevant repair steps.
Other
You can contact us through our contact page! We will be happy to assist you.